Okay, this is going to sound crazy but my mom doesn’t like cinnamon. She basically deprived me of a childhood filled with cinnamon toast, snicker doodles and cinnamon rolls. Thankfully for me, I discovered the good stuff at the mall where I would shamelessly line up again and again for the free Cinnabon samples. Those were the carefree days of samples without the question of, “Where’s your mommy?” The days before constant parental supervision, rampant allergies and lawsuits.
Those were the days my friend! The first time I had that soft, sweet cinnamon-y-sugar, cream cheese topped deliciousness on a toothpick my life changed. I was totally, completely in love. Cinnabons were way better than Coco Pebbles, Fruit Roll Ups and FunDip.
Cinnamon buns truly make everything right with the world. I had a lot of fun making this recipe, mostly because I hardly ever work with yeasted doughs – I even had to go out and buy yeast because my yeast was dead. Fresh yeast in hand, I knew that I wanted to make a simple, no-knead sweet dough and used the basic no-knead ratio of 100 parts flour, 1 part yeast and 70 parts water. I added in sugar to make it a sweet dough and that was it: super simple, no-knead cinnamon buns. Of course, it’s not like cinnamon bun dough needs much kneading anyway, but I’m on the no-knead bandwagon and I’m not hopping off any time soon!
I am cream cheese topped, I am cinnamon swirled: I am a cinnabon!
The Best No-Knead Cinnamon Roll/Cinnabon Recipe
makes 9 rollsBuns
- 1 cup + 2 tablespoons + 1 teaspoon milk
- 1 teaspoon active dry yeast
- 2 1/4 cups bread flour
- 1/2 teaspoon salt
- 1/4 cup sugar
- 2 tablespoons + 2 teaspoons butter
- 1 room temperature egg, lightly beaten
Filling
- 1/2 cup brown sugar, packed
- 2 tablespoons ground cinnamon
- 1 tablespoon flour
- 1/4 cup butter, at room temperature
Frosting
- 4 ounces whipped cream cheese (about a cup)
- 2 tablespoons room temperature butter
- 1/4 cup sugar
Melt the butter in the microwave and set aside to cool. Mix together the milk and yeast and set aside. In a large bowl, stir together the bread flour, salt and sugar. By now the butter should be slightly cool – add it to the milk and whisk. Add the beaten egg and make sure everything is mixed together throughly.
Add the milk mixture to the flour and stir until everything comes together in a fairly wet dough. Cover with saran wrap and proof for 2 hours.
In a small bowl, mix together the brown sugar, cinnamon and flour. Set aside. Line a 8-inch pan with parchment paper.
After 2 hours, the dough should have doubled in sized. I like to work my dough on parchment paper as it makes it easier to pick up the edge of the dough when rolling. If you are going to work on parchment paper, be sure to tape it down so it doesn’t move while you’re rolling. Generously flour your workspace and hands. Scrape the dough out onto the floured workspace and dust with flour. The dough will be very soft and quite sticky so if you need to dust it, go ahead and dust generously.
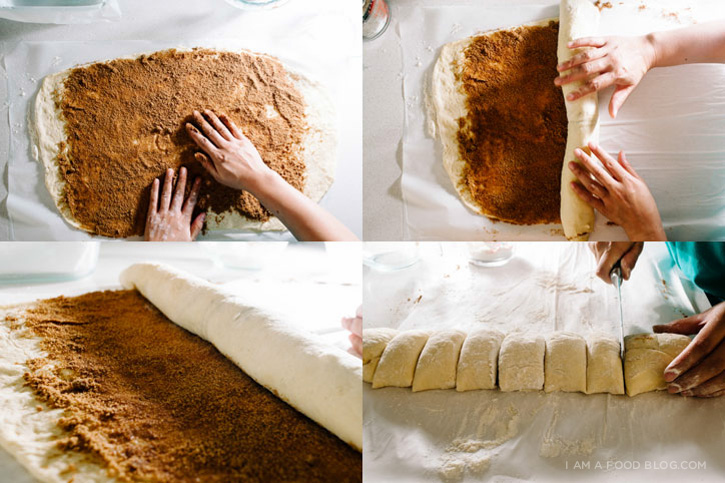
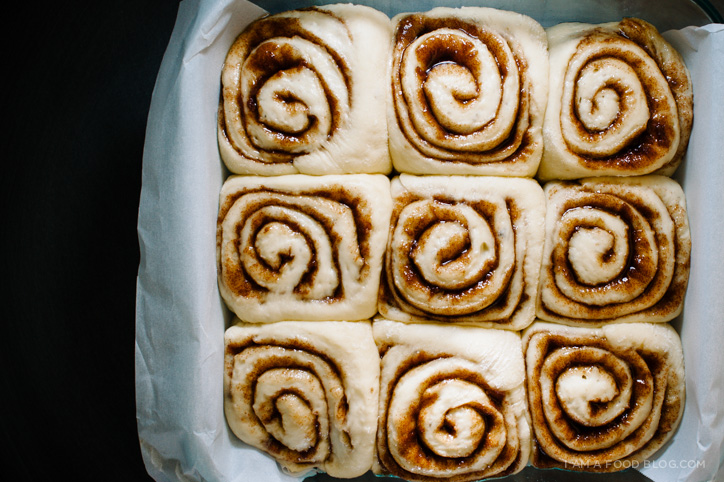
Roll out the dough to a 14 x 20″ rectangle. Spread the 1/4 cup of room temperature butter out evenly over the dough and then evenly sprinkle on the cinnamon-sugar-flour mixture. Roll the dough up, starting at a short edge. Cut into 9 equal pieces and place in your prepared pan. Cover with saran wrap and proof for 1 hour.
At this point, you can hold the buns in the fridge if needed. I did just that as I had to run out and do some errands. I returned to bake them after 2 hours, but if you’d like to prepare them the night before and bake them off in the morning that would work too.
To bake: Preheat the oven to 350°F. Remove the buns from the fridge as the oven is heating up. Bake for 30-35 minutes. While the buns are baking, make the frosting. Cream together the butter and sugar until light and fluffy. Fold in the whipped cream cheese until smooth. Set aside in the fridge.
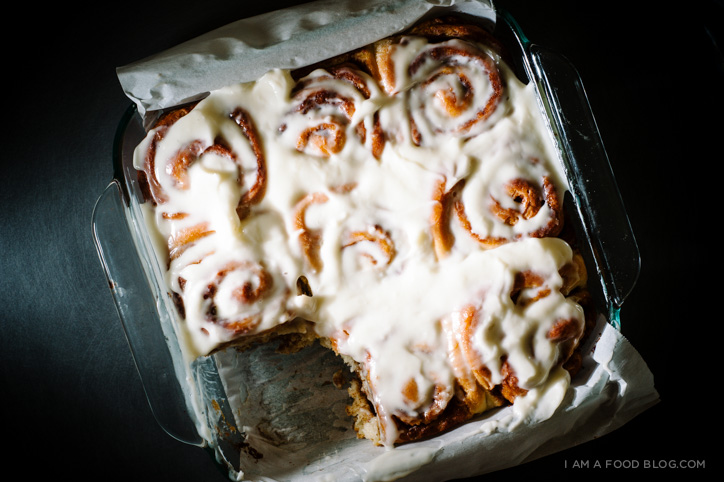
When the buns are done, the tops should be golden brown and a skewer poked through should come out clean. Frost immediately for the Cinnabon look. Let cool slightly and enjoy warm.
A FEW NOTES:
This dough is extremely soft and sticky due to it’s 69% hydration. While drier doughs are easier to handle, this dough yields a supremely soft bun with a delicate crumb. I think it’s well worth the stickiness!
I like using whipped cream cheese for frostings because, well, it’s already whipped which makes it super easy. With whipped cream cheese you don’t get any of those annoying bits of cream cheese in your frosting, just super smooth creaminess.
These keep in the fridge for up to a week, covered. If anything the taste better as they age, but be sure to microwave them a bit before eating though – 20 seconds ought to do it!
PS – I’m heading off to the Saveur Best Food Blog Awards in Vegas tomorrow! I’m so excited to meet everyone! I’ll be the awkward, fan-girly one. You can check out my pictures on Instagram. If I remember to post that is. After all, you know what they say!


Hey Steph! Absolutely love your food blog and have to say that this is some of the best photography I’ve seen anywhere. This is the first recipe I’m actually attempting and had a question – when you say 1 Cup + 2 Tablespoon + 1 Teaspoon Milk, does it all go together and mixed in with the yeast? Sorry for the dumb question,and keep this awesome project going!!
Hi Lynel,
Yes, all of the milk (1 cup + 2 tablespoons + 1 teaspoon) goes in all together. The measurements are little funny because I was working with the no-knead ratio. Hope your cinnamon buns come out!! Remember, they’re quick sticky when you’re mixing everything together before the first rise, so don’t worry about how it looks, after the first rise, it’ll look more like a dough. Good luck!!
i’m pretty sure i’ve done everything right, but the dough was barely dough and hasnt risen at all!!? is it usual to be so temperamental??
fear not! i was being a fool and didnt put as much flour as you said, i read it as 2 quarter cups, instead of 2 and a quarter! doh!
whew!! i was worried! hope they work out for you!!
Could you tell me the best substitute for bread flour? or How do I make bread flour?
bread flour has more gluten in it – i’m not too sure if you can make it. you could try with all-purpose, but it might be slightly more tough.
These were delicious! I need some more practice working with such a soft dough. My rolls didn’t turn out nearly as pretty as the pictures you show but they tasted amazing!
the soft dough is a little troublesome to work with, but the rolls end up so, so soft!
Hello! This looks like a lovely recipe to try over the weekend. Question about putting the dough in the fridge: do you let it rise for an hour after cutting and then put it in the fridge OR do you pop them in the fridge immediately after cutting? When ready to bake, do you need to bring the dough back to room temperature first or can you pop them into the oven right away? Thanks in advance! :)
Hi Yosita,
Let the dough rise for an hour after slicing and placing the pan, then place in the fridge. Take the rolls out of the fridge and let them rest on the counter while you preheat your oven.
Hope that helps!
Thank you! That helps indeed. We’re fasting for Ramadan this month and I plan to make these for breaking fast this upcoming weekend. Thanks again for sharing. Btw, I love your blog! :)
I’ve been wanting to make cinnamon rolls from scratch for some time now (even though bread baking terrifies me) and once I read your recipe and how easy it seemed I knew I had to finally take the plunge. You weren’t kidding about this dough being sticky and tough to handle! I thought I floured my work surface well enough but when I went to roll them up, the dough stuck to my parchment paper in several places. I managed to still get them into sort of circle shapes and into the pan so it wasn’t a complete loss. Despite that though, they turned out incredible! Thanks so much for sharing :)
Hey Steph,
Your recipe looks soooo good. My dough didnt rise And I was wondering if it was because I didn’t do something correctly? Do I cover the bowl tightly with Saran Wrap or loosely? Do I need to keep it in a warm spot? (I left it out on the table). Or maybe the yeast and milk, how long should that have sat out for and should it have been warm milk? Sorry for all the questions!!!just trying to figure out why it didnt work. It’s new yeast and bread bought today too.
THANKS!!!
Hi Jane,
You need to cover the bowl tightly and leave it in a warm spot – if your house is on the colder side, it will take longer to rise. If your oven has a proof mode, you can go a head and use that. Otherwise, you can turn your oven on for a minute or two, turn it off and then let the dough rise in the slightly warm oven.
The milk doesn’t need to be warm to activate the yeast, but if you’re having trouble, slightly warmed milk will help it out.
Hope that helps!