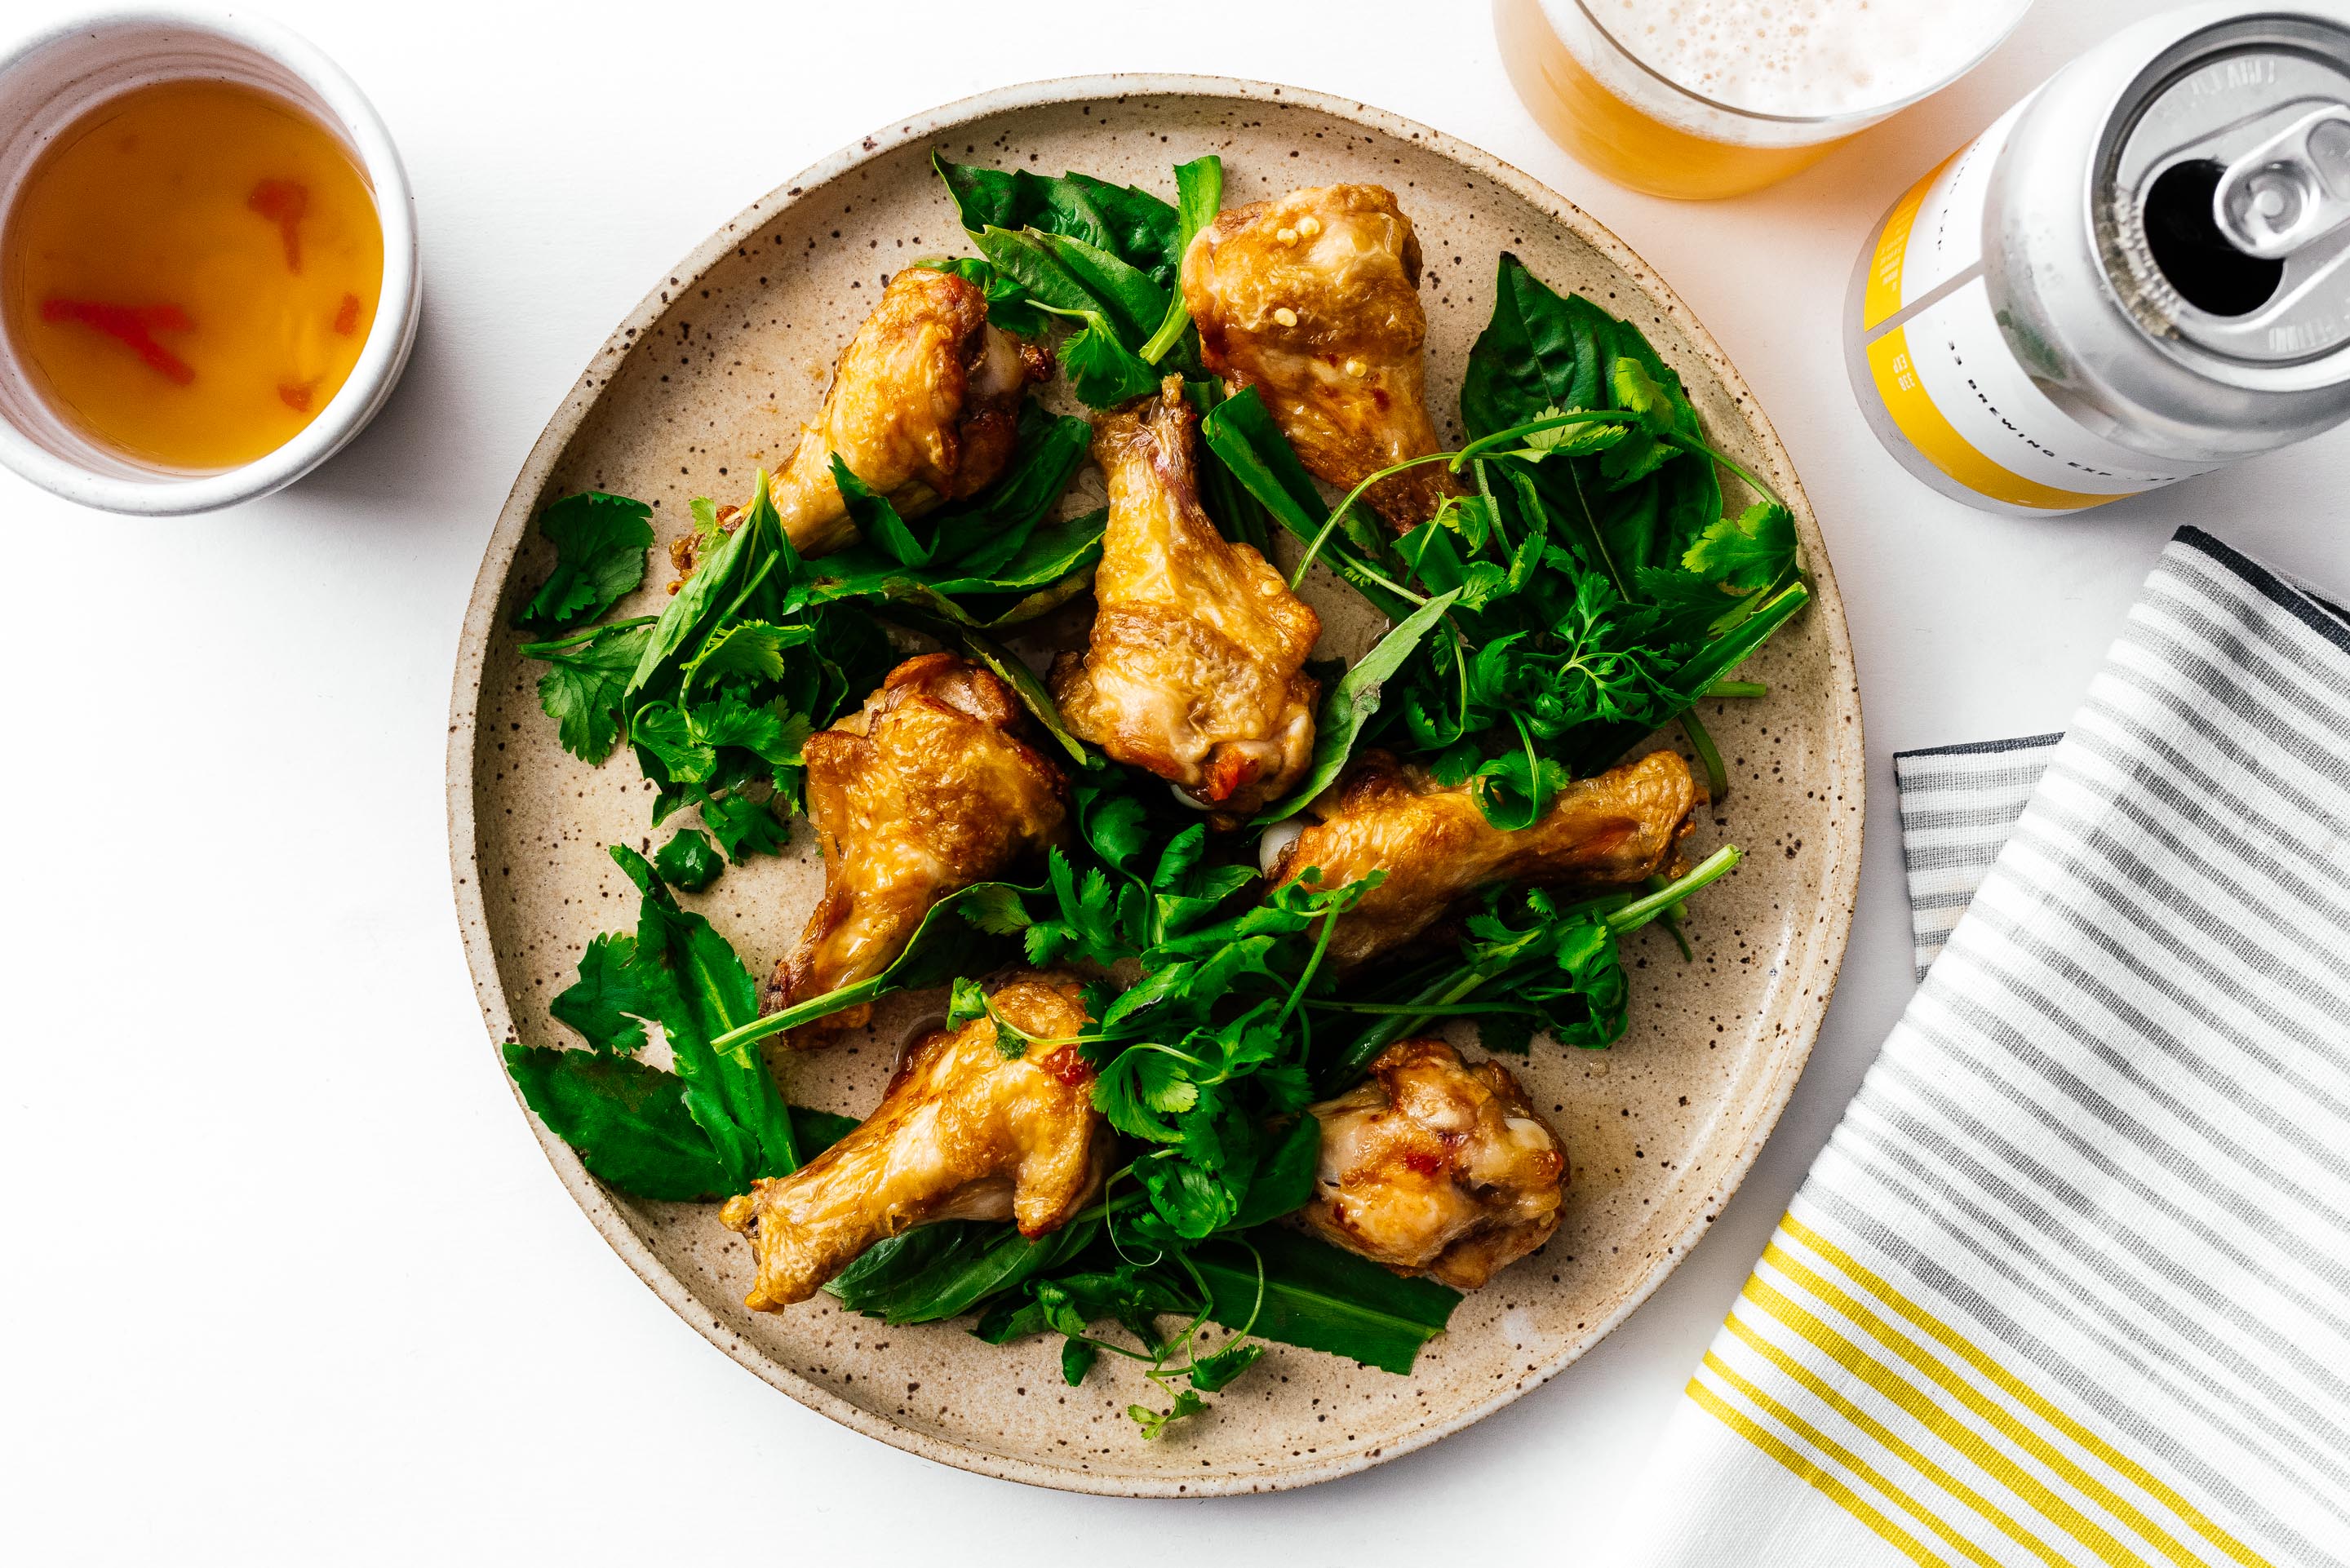
I Am... Extra Easy Pok Pok Style Fish Sauce Chicken Wings
The other day Mike and I and a couple of friends did a Hot Ones challenge. We supplied the wings and the air fryer, one friend brought ALL the hot sauces, and another one brought the booze. It was a hilarious night filled with hot sauce, tears, chicken wings, and pure love.
Read More →
I Am... An easy weeknight oven roasted lemon pepper chicken recipe
Everyone loves lemon pepper chicken, but if you use the premixed seasoning, you're probably cutting your life short from the sodium content alone. This is a healthier alternative that may or may not taste like the stuff you love, but it's way healthier and super delicious: perfect oven roasted chicken baked with a lemon pepper olive oil mix that sates your soul (and tummy). Cooking Notes Tempering your chicken on the countertop when you come home from the store will ensure faster, more even cooking. If you don't have a meat thermometer, you can cut one open to check if it's done, but a good thermocouple thermometer isn't very expensive and takes the guesswork out of cooking. Ingredient Notes Lemon Pepper Seasoning is a classic salt and pepper blend with lemon zest. If you want to go that route, let your lemon zest dry out and crush sea salt, freshly ground black pepper, dried lemon zest, and a tiny bit of garlic powder to make your own. Go for good quality first pressed olive oil. It's not too much more money and way tastier. What do you need? Just a baking dish. A zester is optional but makes life a lot easier.
An easy weeknight oven roasted lemon pepper chicken recipe Serves 21. Preheat your oven to 450ºF and season your chicken with salt and pepper. Allow to temper while making the sauce. 2. Zest your lemon and thinly slice half of the lemon. Reserve the zest and the slices. 3. In a small bowl (or directly in the baking pan if you’re feeling adventurous) add 1/4 cup olive oil, the juice of the remaining half lemon, and oregano. Taste and season with salt and pepper. 4. Place the chicken, shallots, green onions, and lemon slices into the baking pan. Pour the sauce over top and roast for 20 minutes, or until the meat hits 150ºF in the center. 5. While the chicken is roasting, use the back of a spoon to crush together 1 teaspoon of crushed black pepper with the remaining lemon zest. Remove and garnish with the lemon pepper mix.
- 4 bone-in skin-on chicken thighs
- 1 lemon
- 1/4 cup olive oil
- 1 tsp oregano
- 2 shallots, peeled and halved
- 2 green onions, trimmed and halved
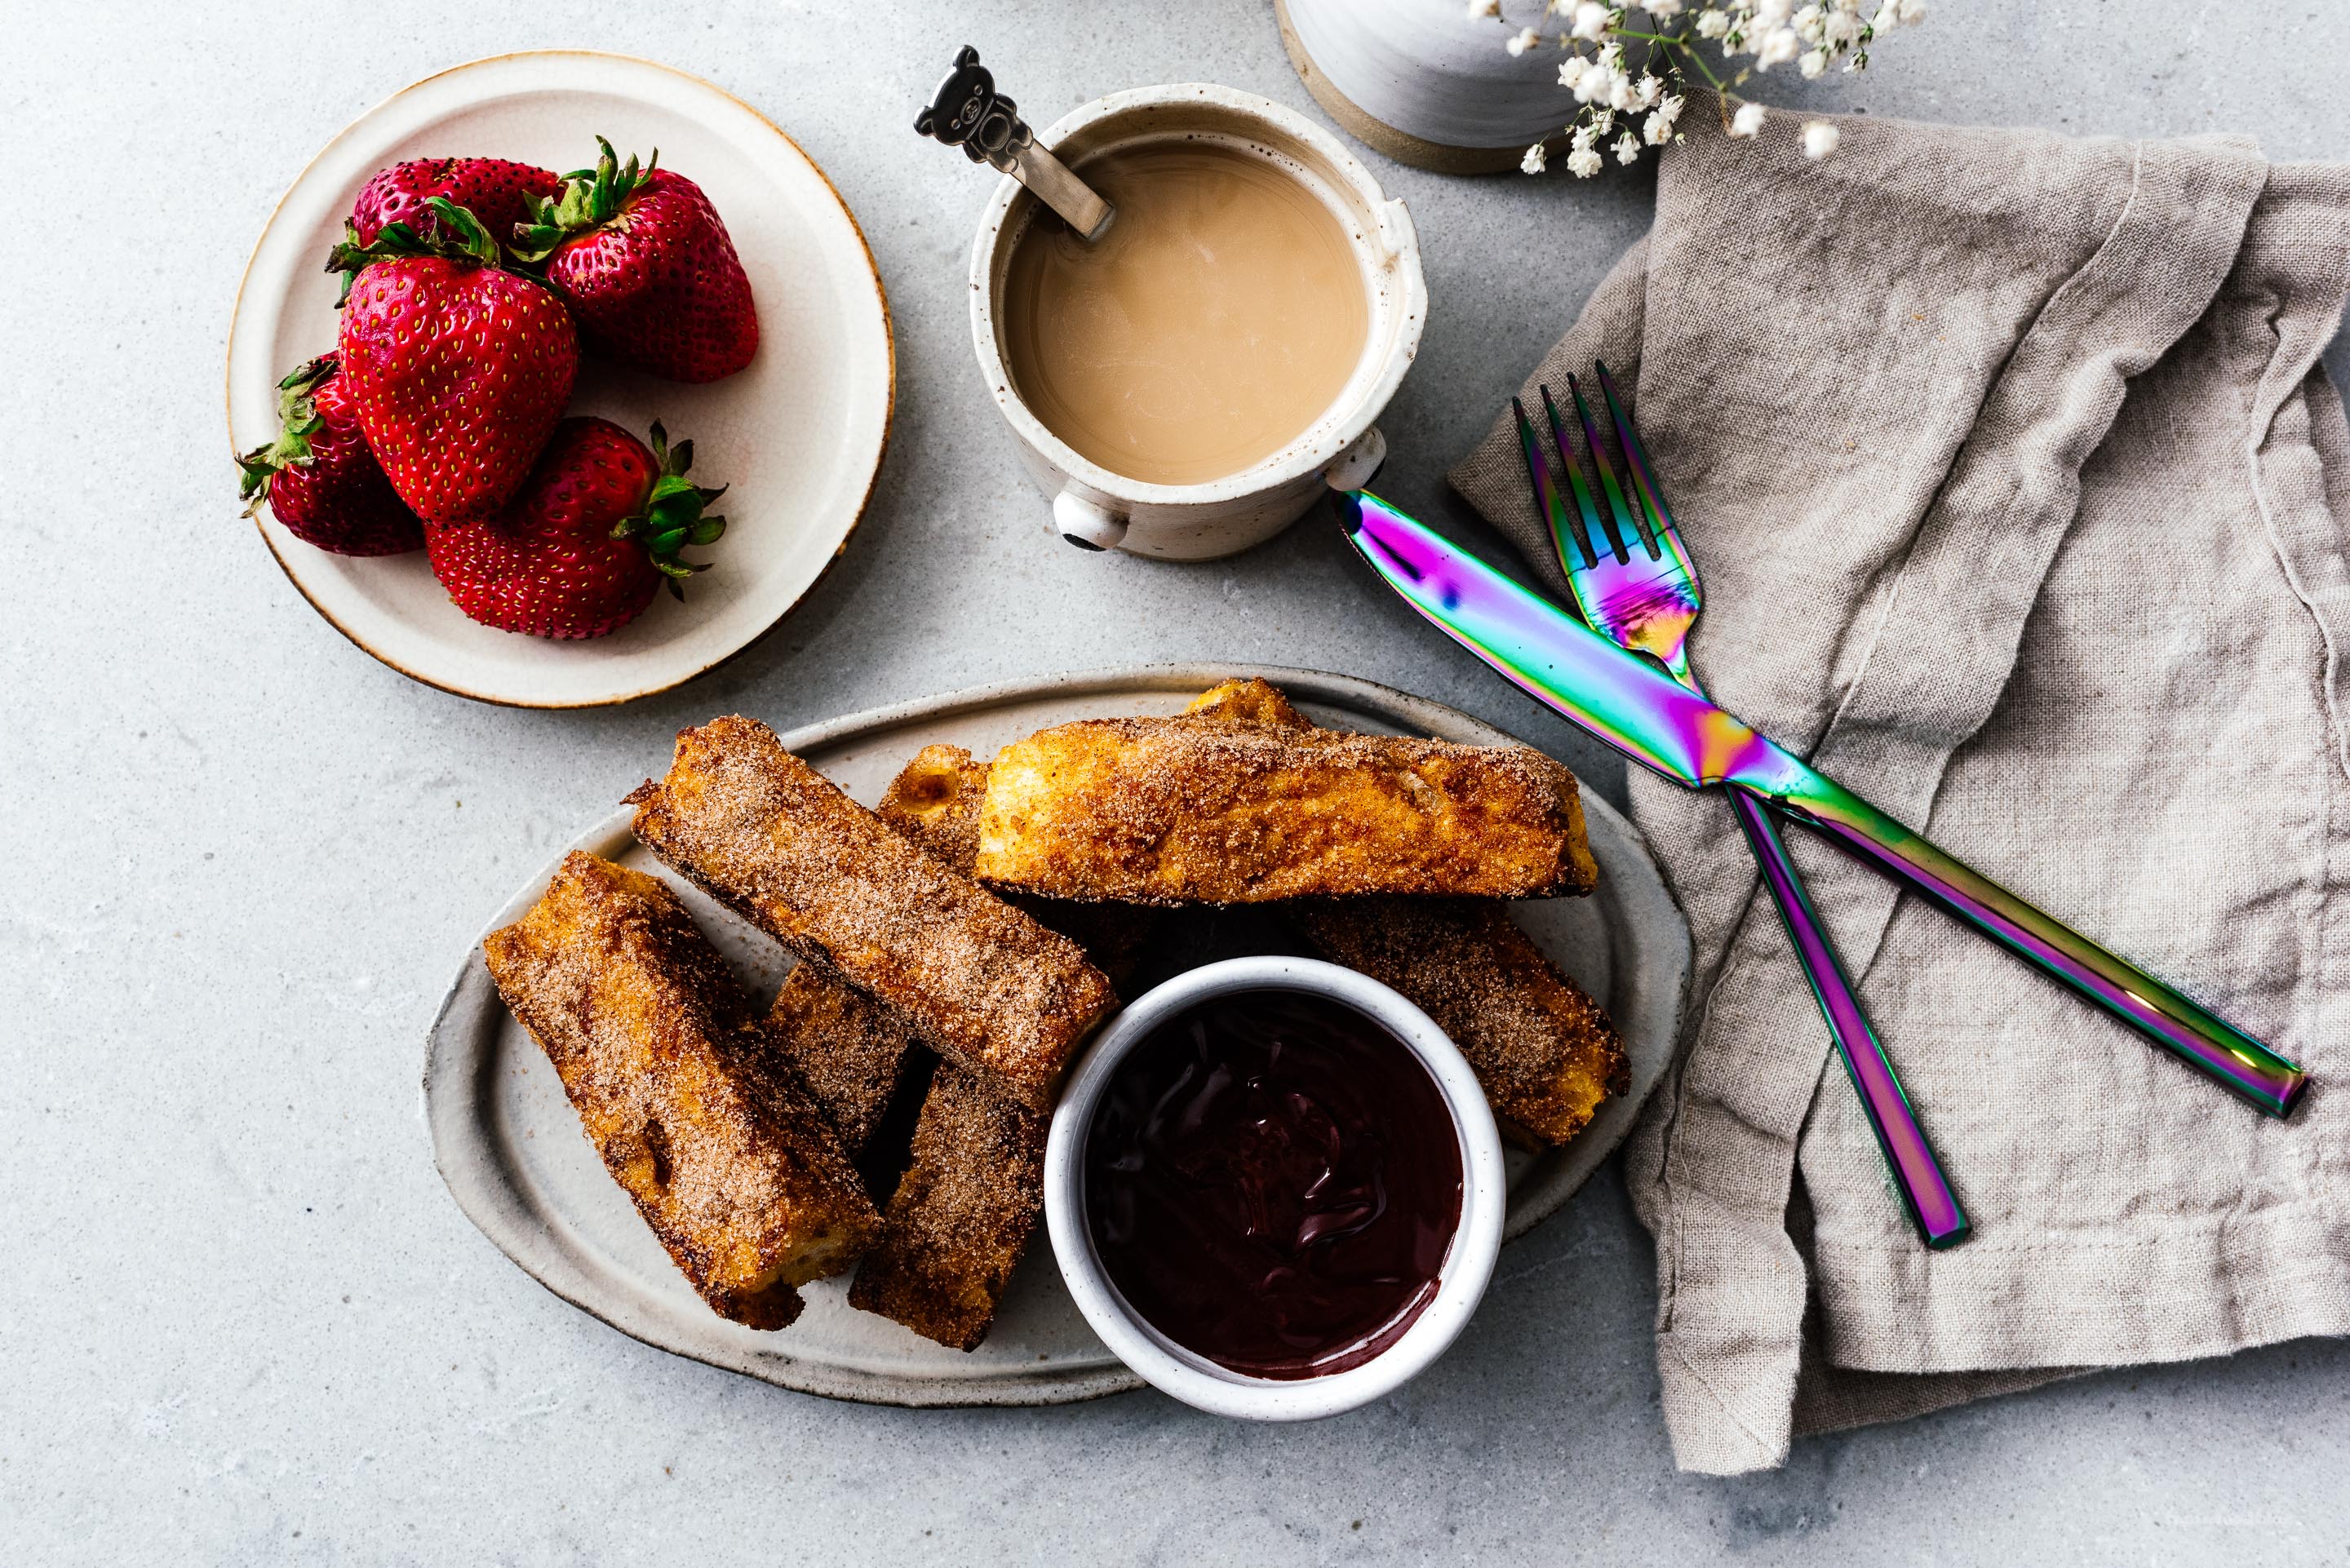
I Am... The Best French Toast You’ll Ever Eat: Churro French Toast Sticks
Gosh darn it, I love French toast. The crisp caramelized exterior, the eggy soft custard bread-y insides. The toppings. The icing sugar. The syrup. EVERYTHING about French toast makes me insanely happy. I feel like maybe I could start a French toast restaurant? Like IHOP but for French toast? International House of French Toast? IHOFT? Would you hit it up? I would do sweet and savory French toasts and I would make sure if you wanted you could order a progression of French toasts so you could start with a little appetizer style one, then move on to a savory, then have a dessert one. We could do sizes too so you could just get one slice if you want to have more varieties. GAH. It would be SO GLORIOUS.
Read More →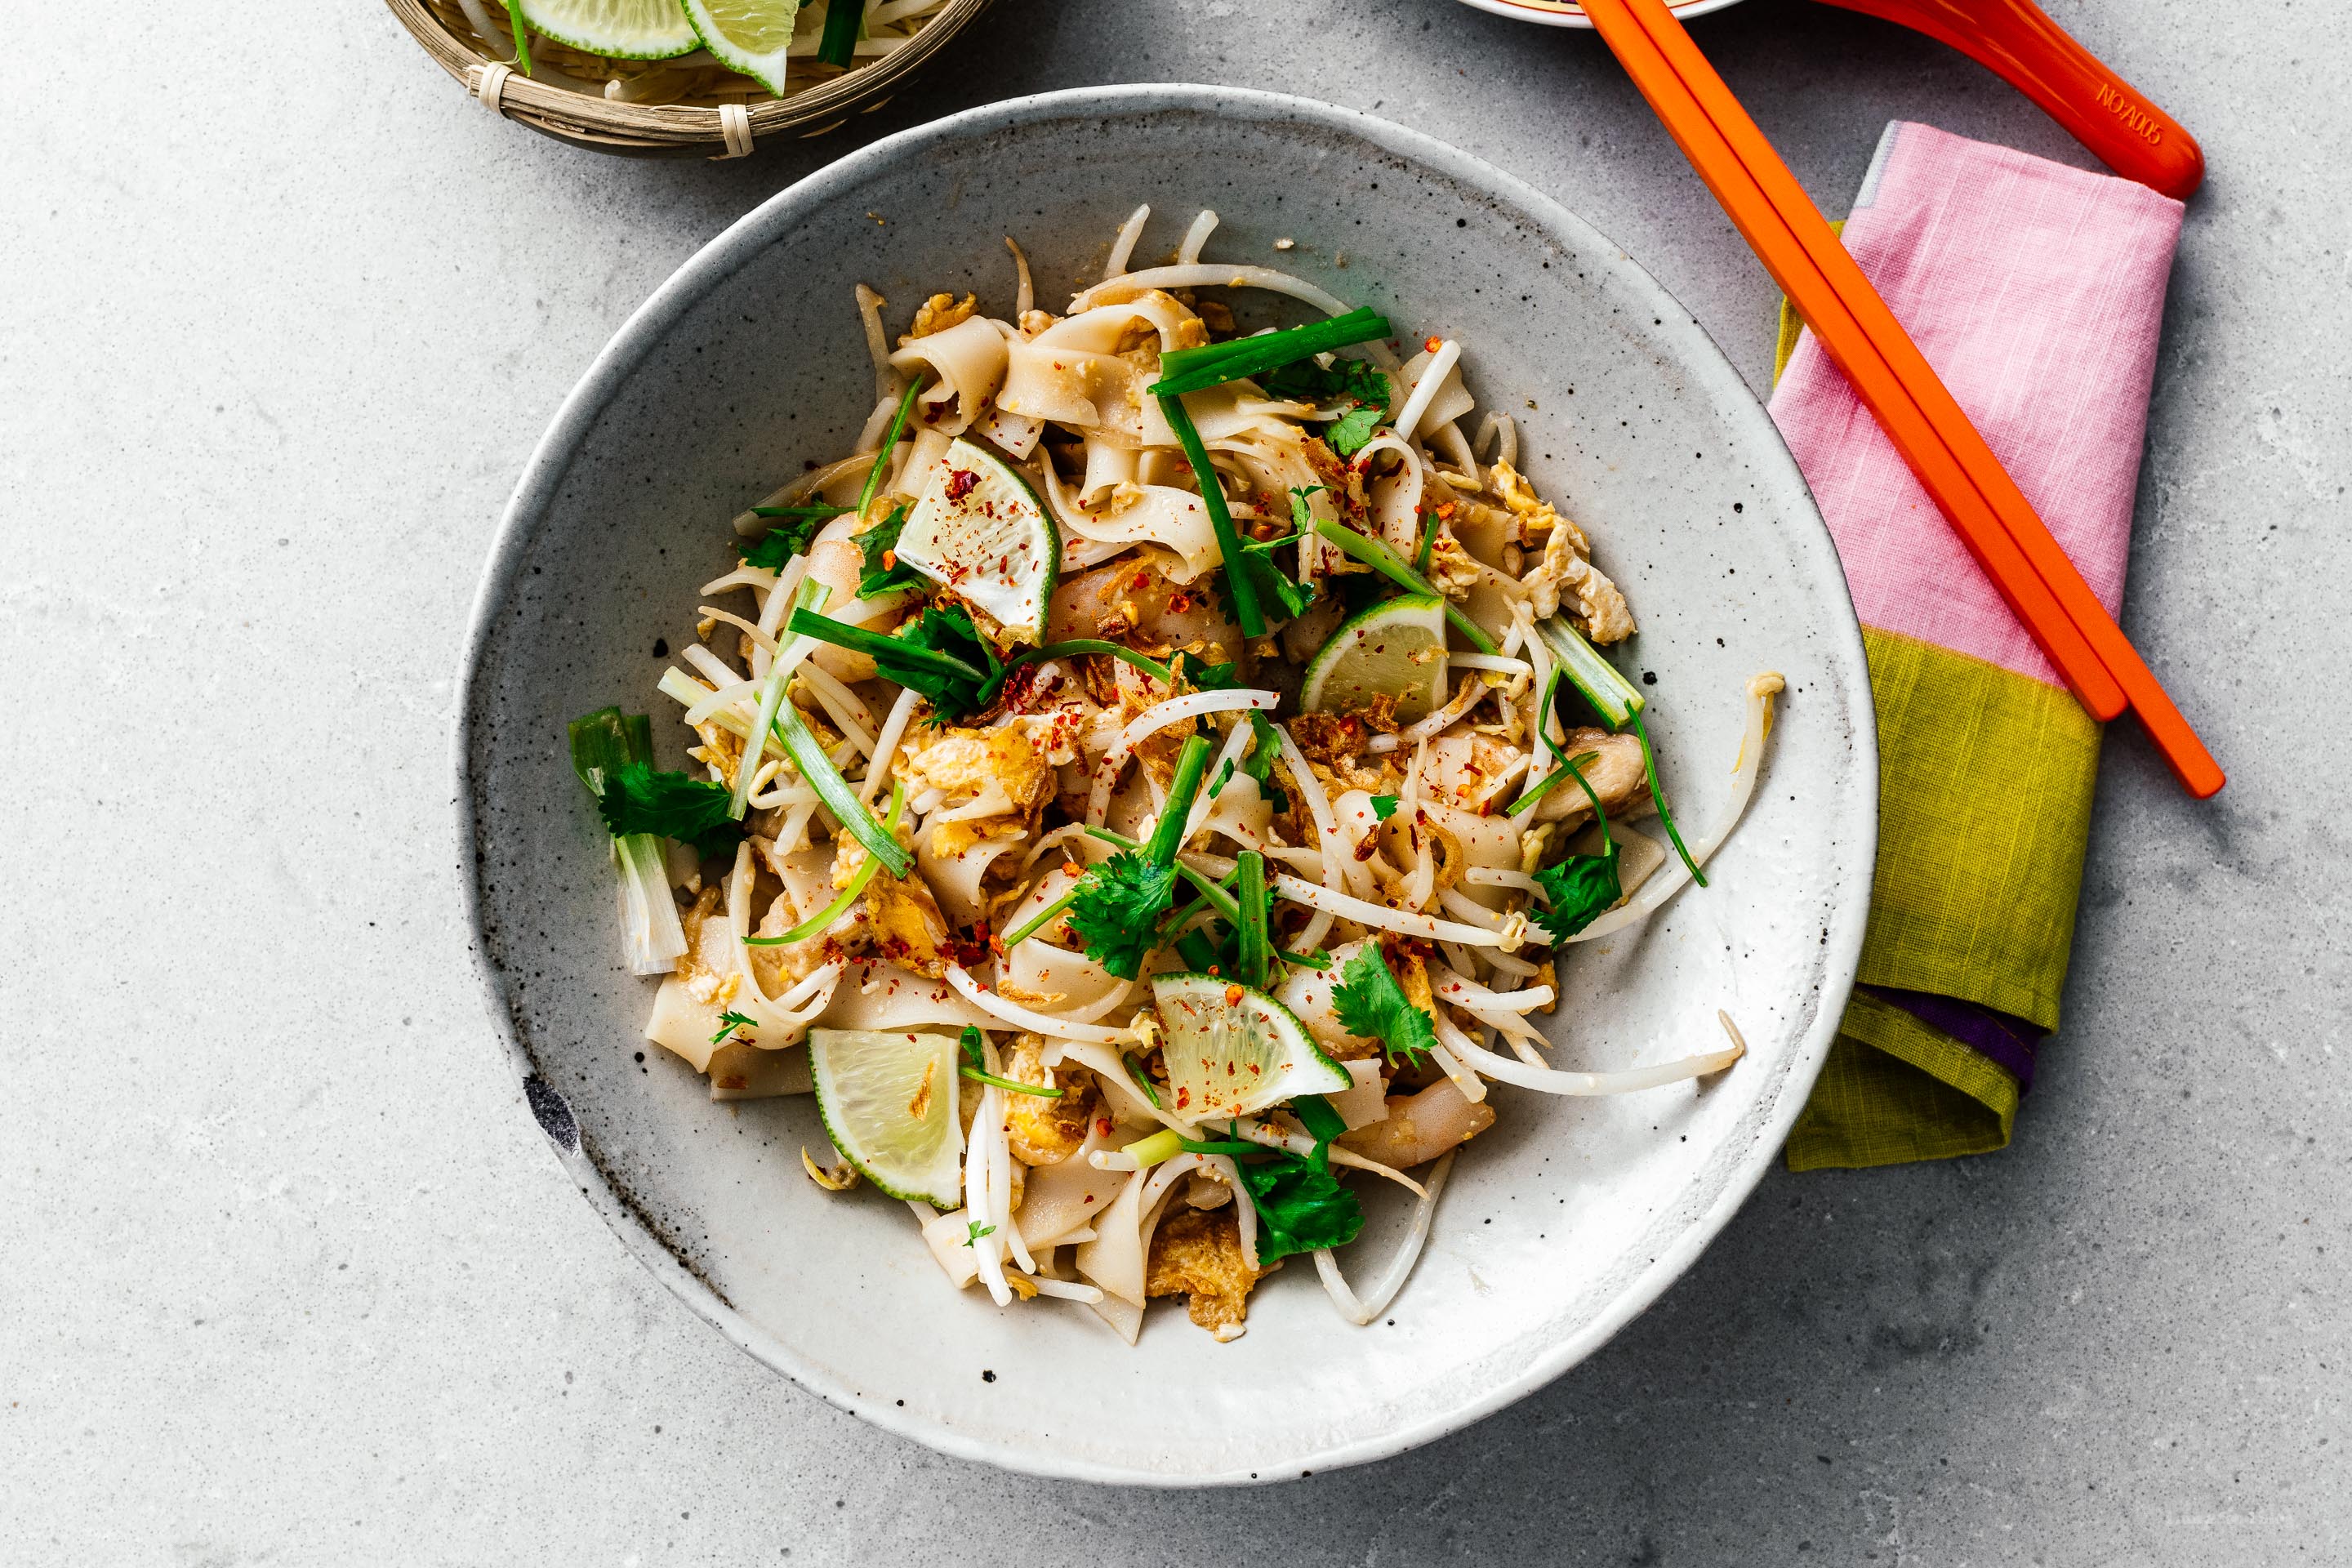
I Am... Better than Take Out Peanut Free Pad Thai Recipe
Mike and I are currently road tripping and camping and it’s been a hilarious trip so far, with me trying to eat keto (my car snacks are macadamia nuts and carb free cheese crips) and various things breaking down that need to be fixed. Still, we’re having an awesome time. There’s something about being in a car that forces you to have deep conversations that you might not otherwise have. Conversations about things like your feelings on roadside attractions (both in favor) and pad Thai.
Read More →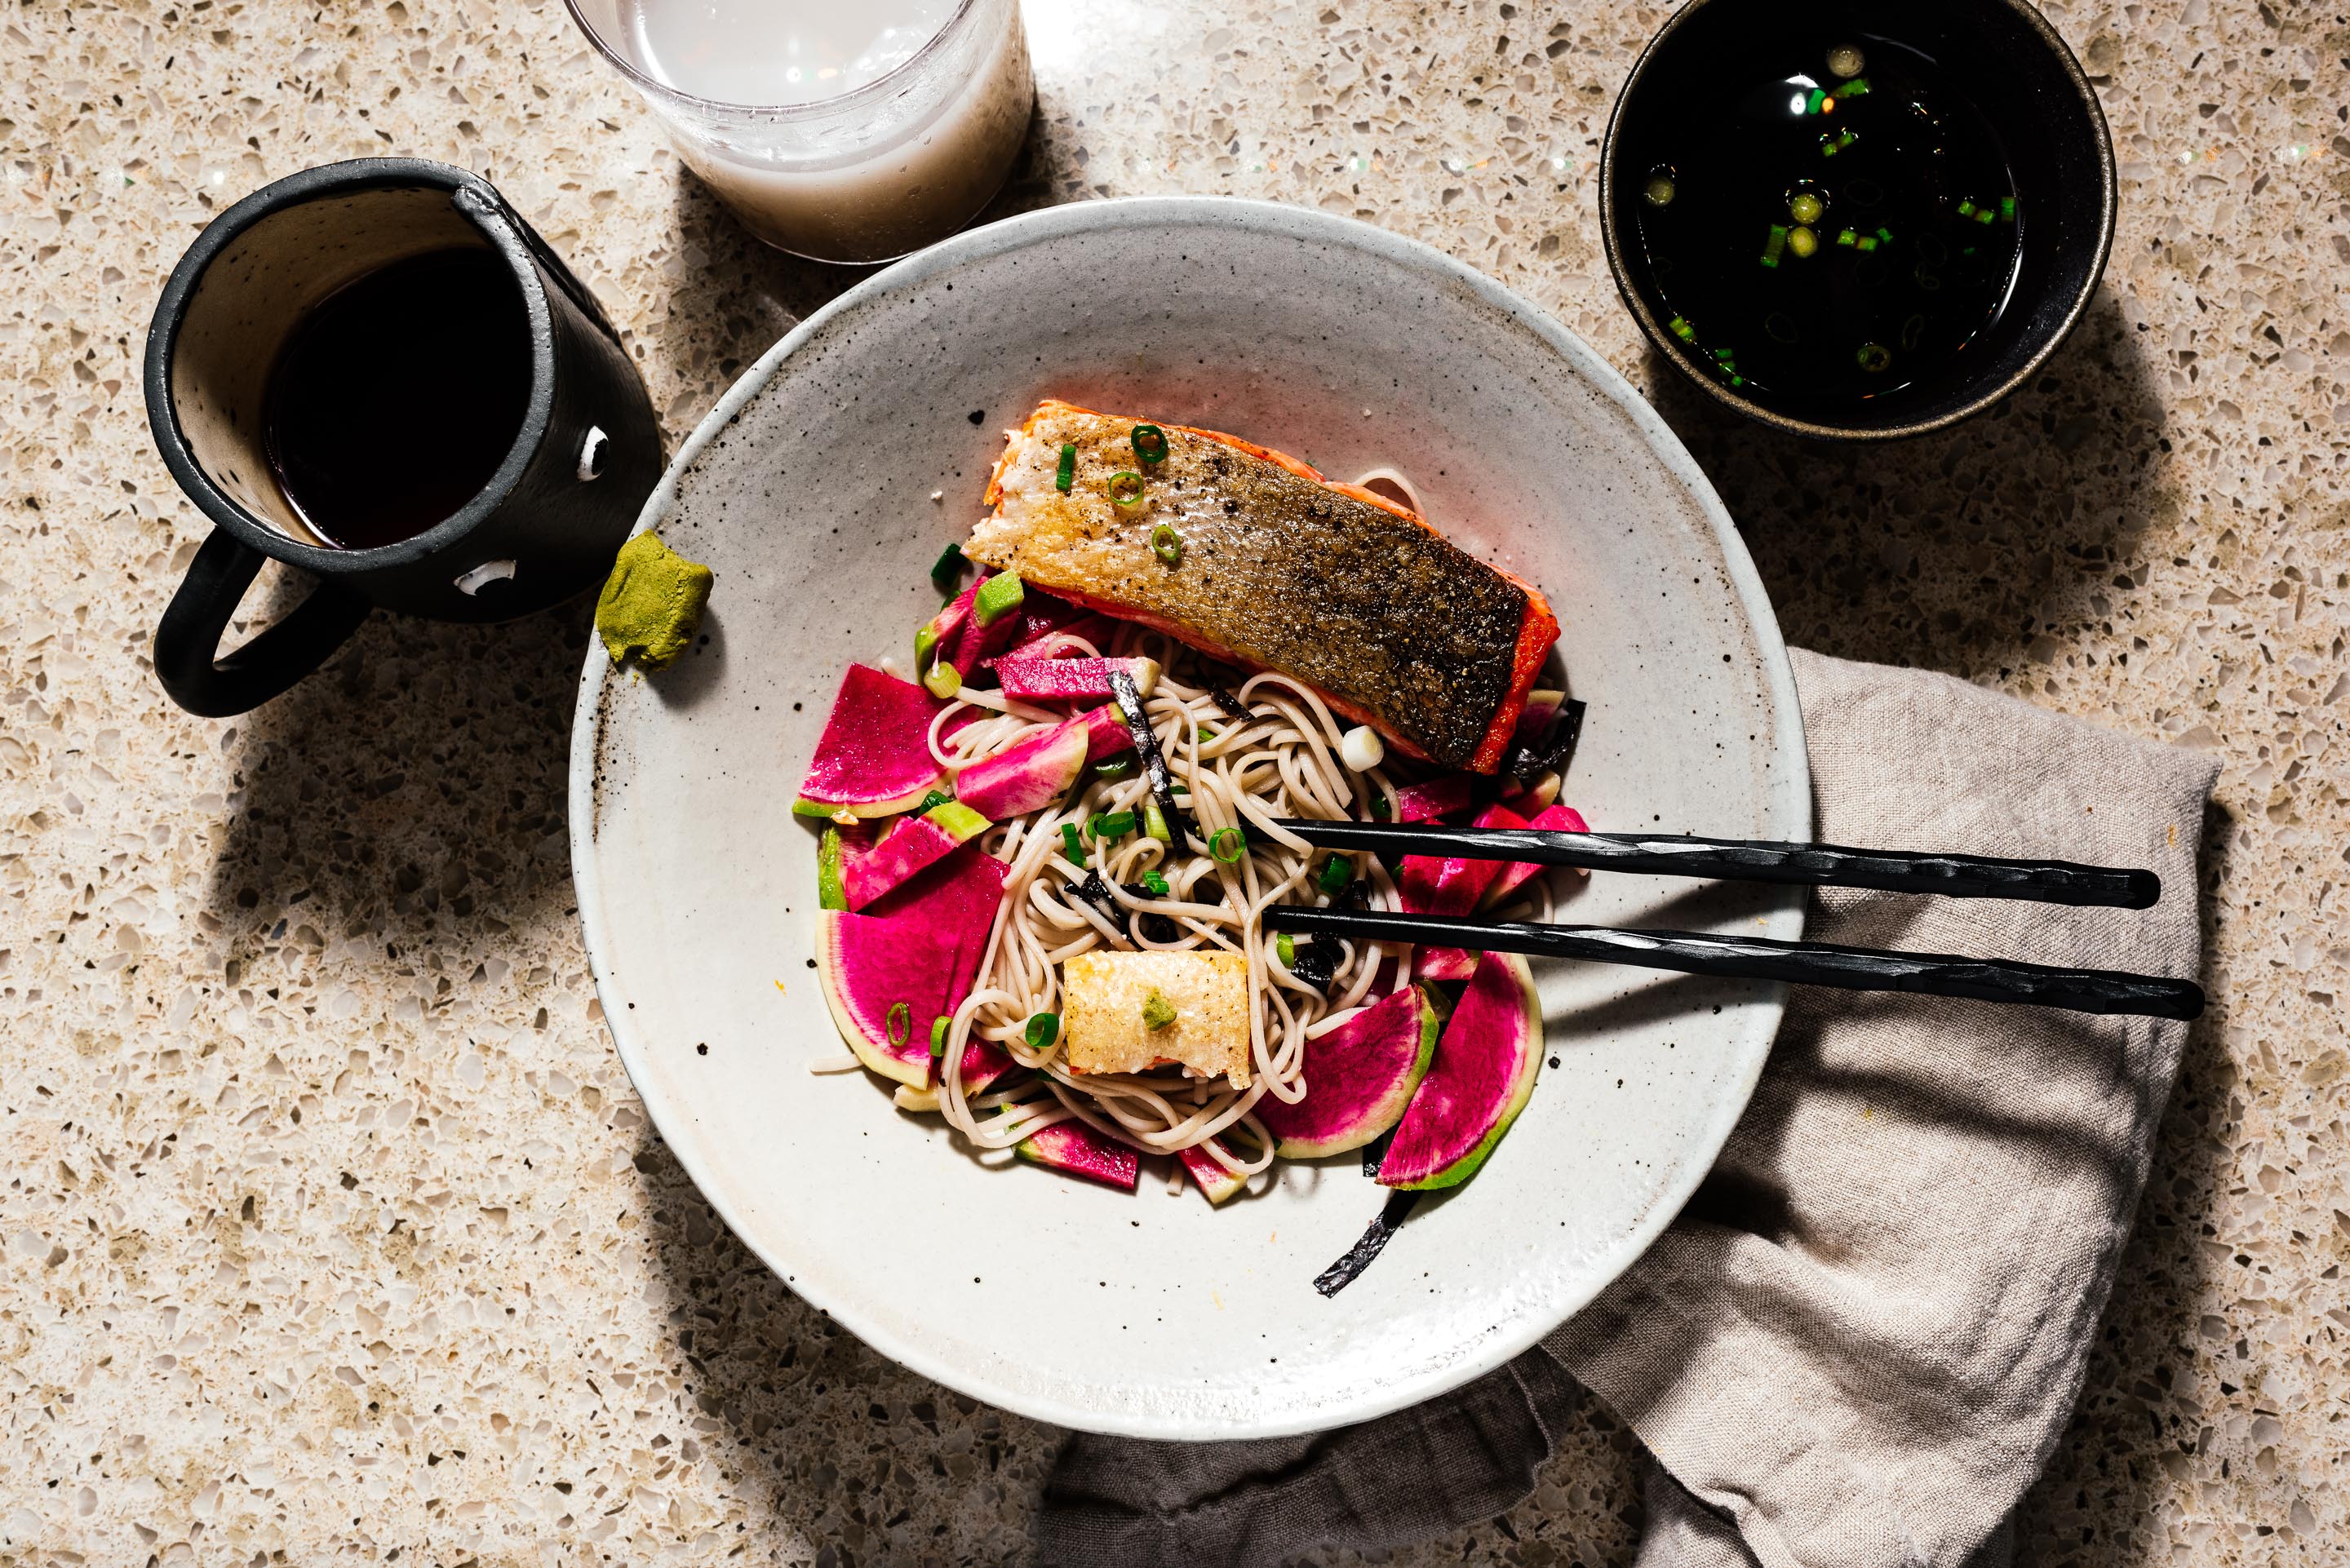
I Am... The best weeknight dinner for summer is 10 minute cold soba recipe
One of the best things to eat when it’s hot out is really good cold soba. In Japan’s pantheon of noodles, soba is king. Ramen and udon have their place in Japanese hearts, but soba is universally respected and loved, and for good reason. Good soba is trascendental: nutty, chewy, and addictive. Pepper potts loves it. Great soba is one of those dishes that are naturally best enjoyed cold, and the best part is, everything can be ready in 10 minutes. Traditionally in Japan soba is eaten with fresh tempura, but this is dinner and chill, so deep frying is out of the picture. Summer though means salmon, and a great crispy salmon is the next best thing to freshly fried tempura. This dish is the perfect weeknight meal when you’re looking for something a little fancier, but want dinner on the table in 10 minutes. As always, here is the countdown: T-10: bring water to a boil and preheat your frying pan with oil T-9: cut radishes T-8: make the quick pickle T-7: add salmon T-6: add soba to water T-5: make wasabi, slice green onions and seaweed T-4: make instant dashi T-3: flip salmon T-2: remove salmon from frying pan T-1: rinse soba, serve, and eat! Cooking Notes Unlike pasta, you want to cook your soba to package directions and rinse in cold water. Crisp, perfectly cooked salmon is easy, but needs patience to learn on your stove. I like to heat up 2 tablespoons oil in a nonstick skillet until just before smoking hot, then turn off the heat entirely (or move to a different burner if you have electric), lay the salmon on skin side down and watch until it’s just about halfway cooked - 5 minutes - and move the pan back onto low heat and flip to the other side for 1 minute. Times might differ if you have a fillet more than an an inch thick, or if your stove doesn't get hot enough to smoke oil. Just look for that halfway opaque look, then flip. While the presentation up above is the normal way you’d see it in America, I actually prefer it Japanese style, with the soba separated on a bamboo sieve to let it breathe, a dipping sauce, and the side dishes on a separate plate. It’s a stretch goal (that’s a lot of extra dishes to wash) but if you do go this route, there is a reward: the soba water can be mixed with the dipping sauce to create a super satisfying and nutritious soup at the end of your meal. It’s called soba-yu and some people believe that a soba meal is not complete without it (top left corner of this photo). Ingredient Notes We’re constantly buying new soba packages to try. While none of the dried packages can match the quality of soba from a famous soba-ya in Japan, all of them have been good-to-great. The secret is in knowing what to get. I like to look for soba that is either 100% buckwheat, or buckwheat with a little flour and salt. The 100% buckwheat can be a little hit or miss and is often hard to find, but when it’s good it’s great. The ones with only buckwheat, flour, and salt are really dependable and that’s what I’d recommend you look for (the white package in this photo is upside down). The dipping sauce (tsuyu) is a super simple one of only dashi and soy sauce. You can (and people do) go way crazier with tsuyu recipes, but I find simple is best. I recommend instant dashi but if you are inclined, all you need to make a wonderful homemade dashi is a small square of kombu and high quality bonito flakes. We ran out of instant dashi so that’s actually what I ended up doing. Just bring 2 cups of water to a boil, take it off the heat, and add 1 cup bonito flakes and a 5x5 square of kombu for some fantastic homemade dashi. But to reiterate: instant dashi can be amazing. Finally, I used watermelon radishes in this recipe but don’t go nuts looking for them, any radish or root vegetable will taste amazing. What do you need? A nonstick skillet, a pot to boil soba in, and a colander of some sort. I really prefer a pasta scooper to get the soba out. A bamboo noodle plate isn't needed but sure looks cool. Garnish Garnishing with sliced green onions, strips of seaweed, and wasabi make all the difference when it comes to soba. You can buy seaweed precut in most Japanese supermarkets, or just cut it yourself with kitchen shears. Wasabi is best in powder form (unless you’re crazy enough to buy a wasabi root) and mixed roughly 1:1 with cold water.
10 minute zaru soba with crispy salmon and quick pickled radishes recipe Serves 21. Prepare your garnishes and toppings. Season your salmon with salt and pepper on both sides and set aside, skin side up. 2. Make the radish pickle by combining radishes with rice vinegar, sugar, salt, and 1/4 cup cold water. Set aside. 3. Bring a large pot of unsalted water to the boil. At the same time on a second burner, heat up some oil in a nonstick skillet until it is just about smoking. 4. While you are waiting for the water and skillet to heat, make your dipping sauce/dressing with soy sauce and dashi. For instant dashi, use 2 cups very hot tap water. See note above for from-scratch dashi. 5. When the water comes to a solid rolling boil, cook your soba according to the package time. 6. Once hot, remove the skillet from the heat and lay your salmon skin side down and reduce the heat to medium-low or low. Cook the salmon for 5 minutes skin side down. or until the flesh is just about opaque halfway way through, then flip and cook for another minute. Transfer to plate. 7. When your soba is done, rinse in cold water. 8. Plate everything and serve. If you are going for a single bowl presentation, spoon a little dressing over the soba before serving. If going Japanese style, save the soba water to serve after the meal.
- 1 large watermelon radish, cubed or sliced
- 1/4 cup rice vinegar
- 1 tablespoon sugar
- 1/2 teaspoon kosher salt
- 1/2 pound salmon fillet, cut in two.
- 6-8oz soba
- 2 tablespoons soy sauce (or to taste)
- 2 cups instant dashi
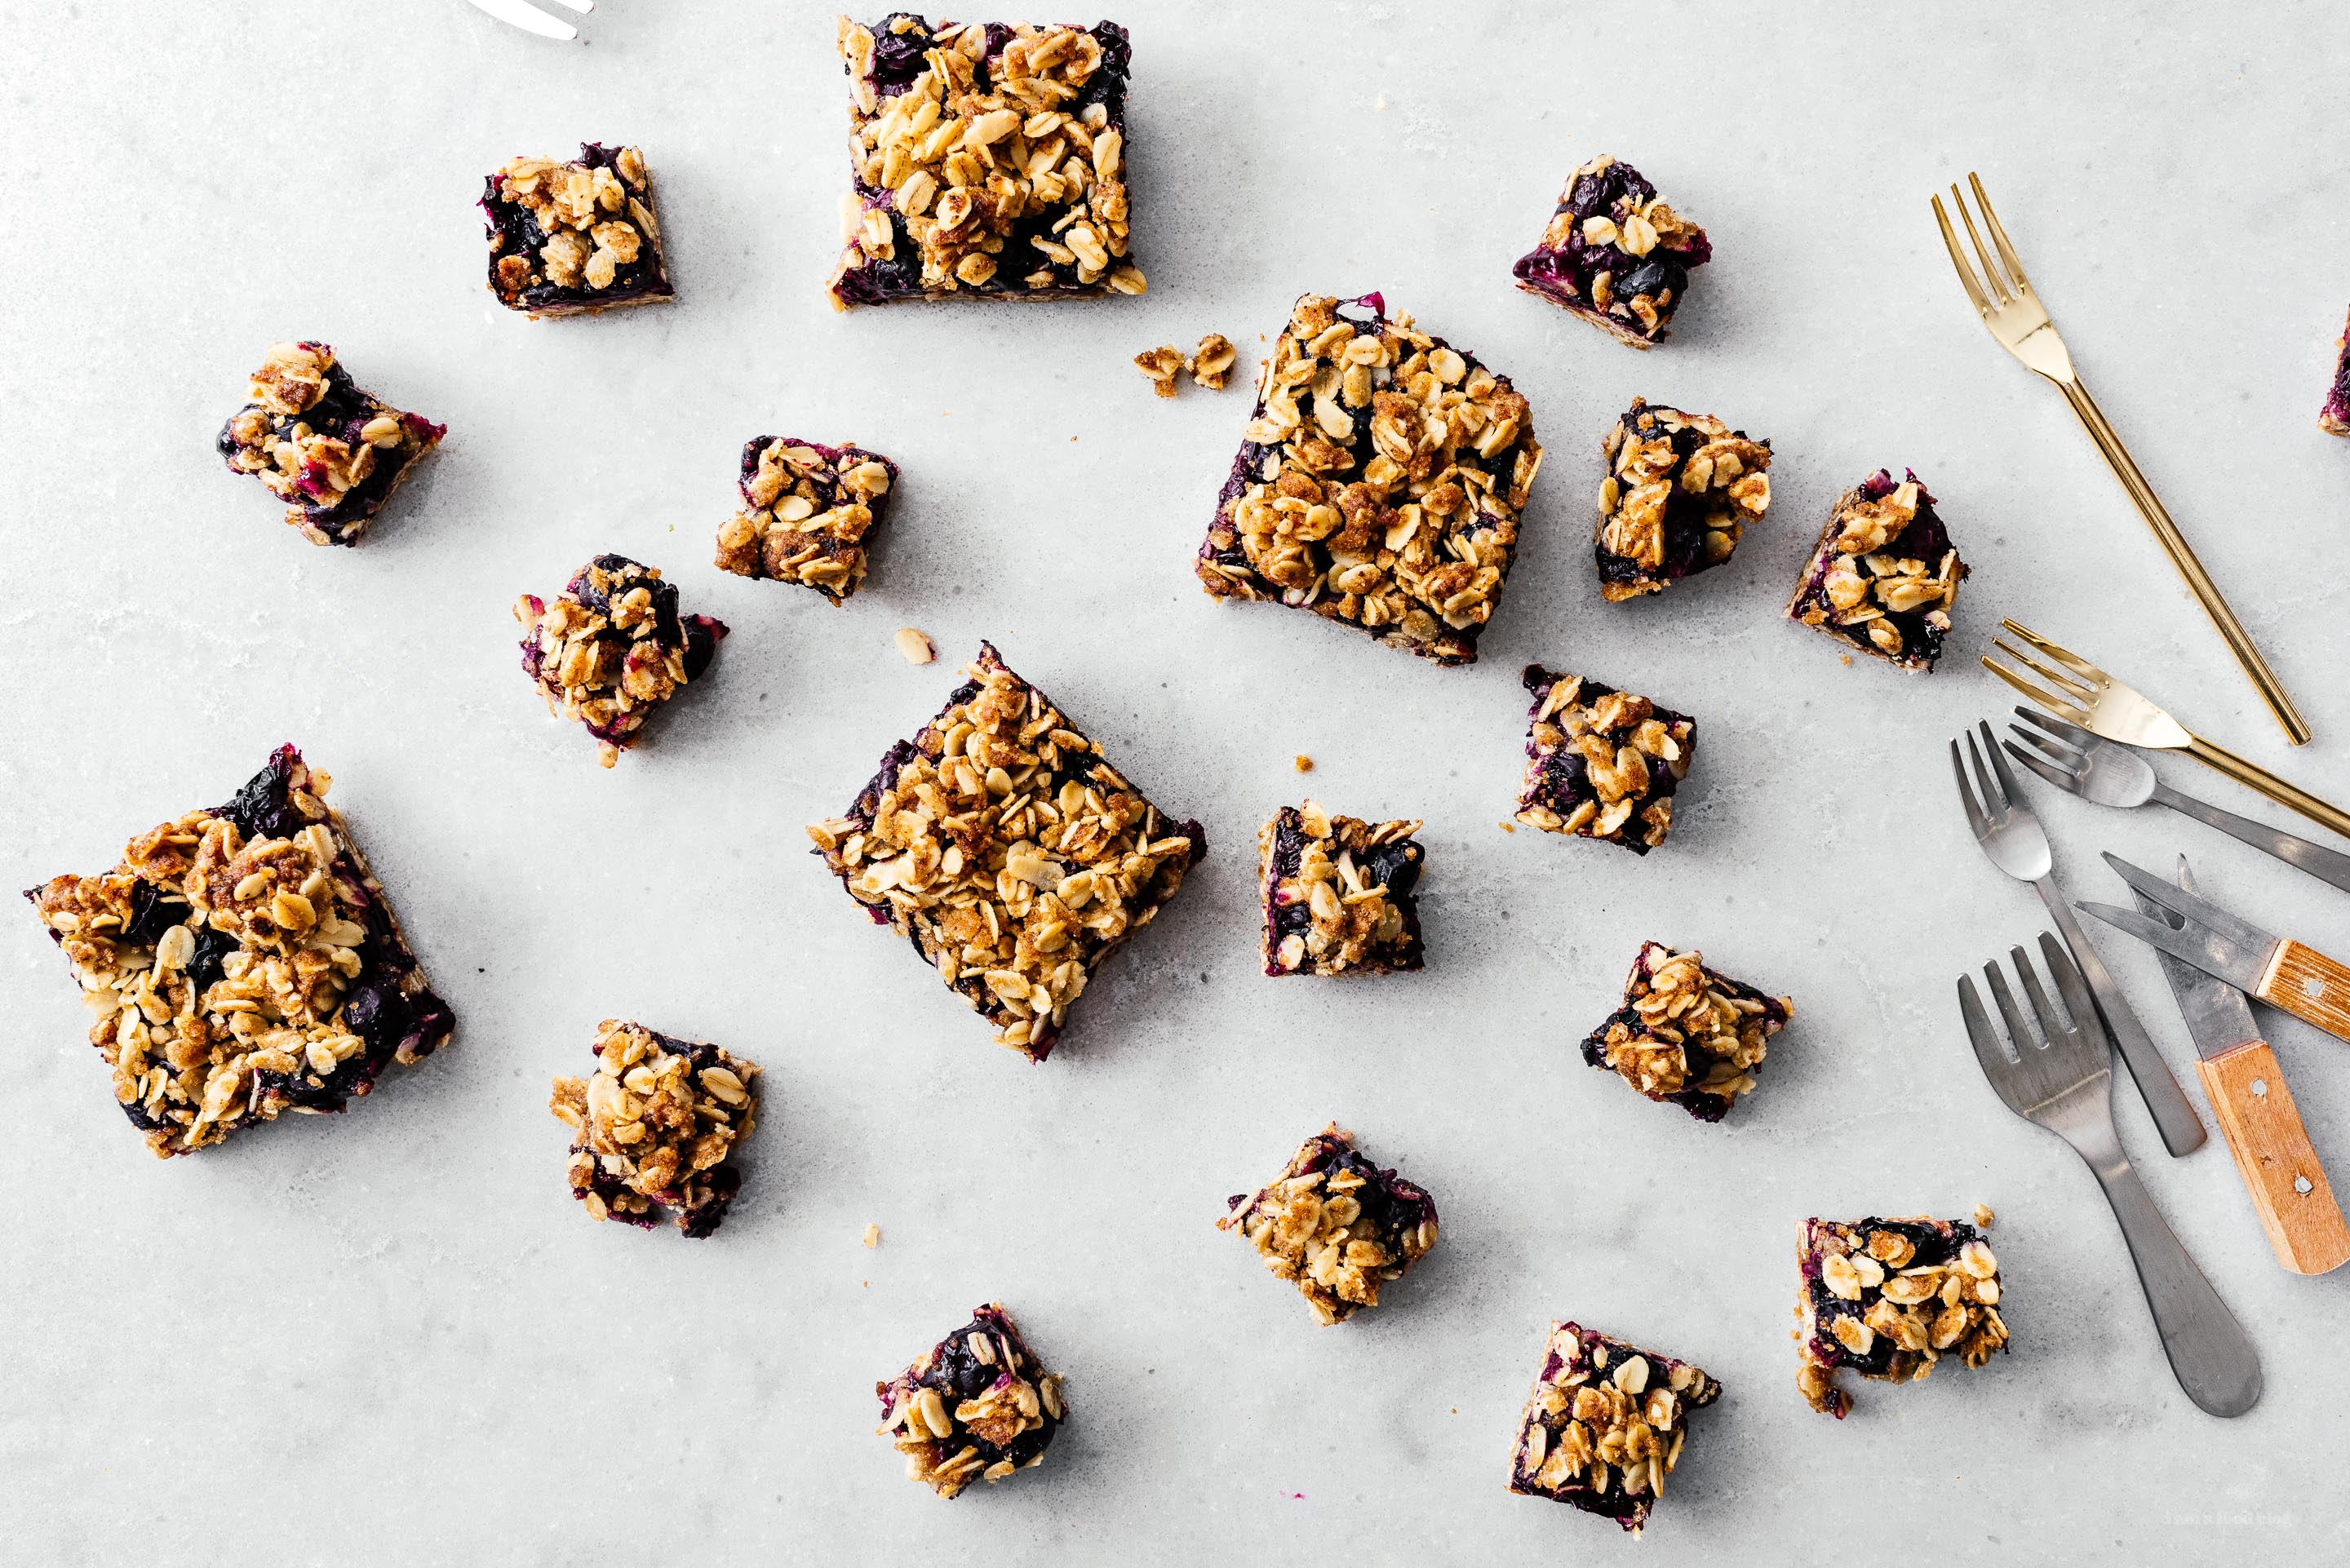
I Am... Small Batch Browned Butter Blueberry Oat Crumble Bars Recipe
It’s blueberry season! Give me all the blueberries because they remind me of the best days of summer: long lazy afternoons spent eating still warm from the sun berries, my fingers stained with the most delicious juice.
Read More →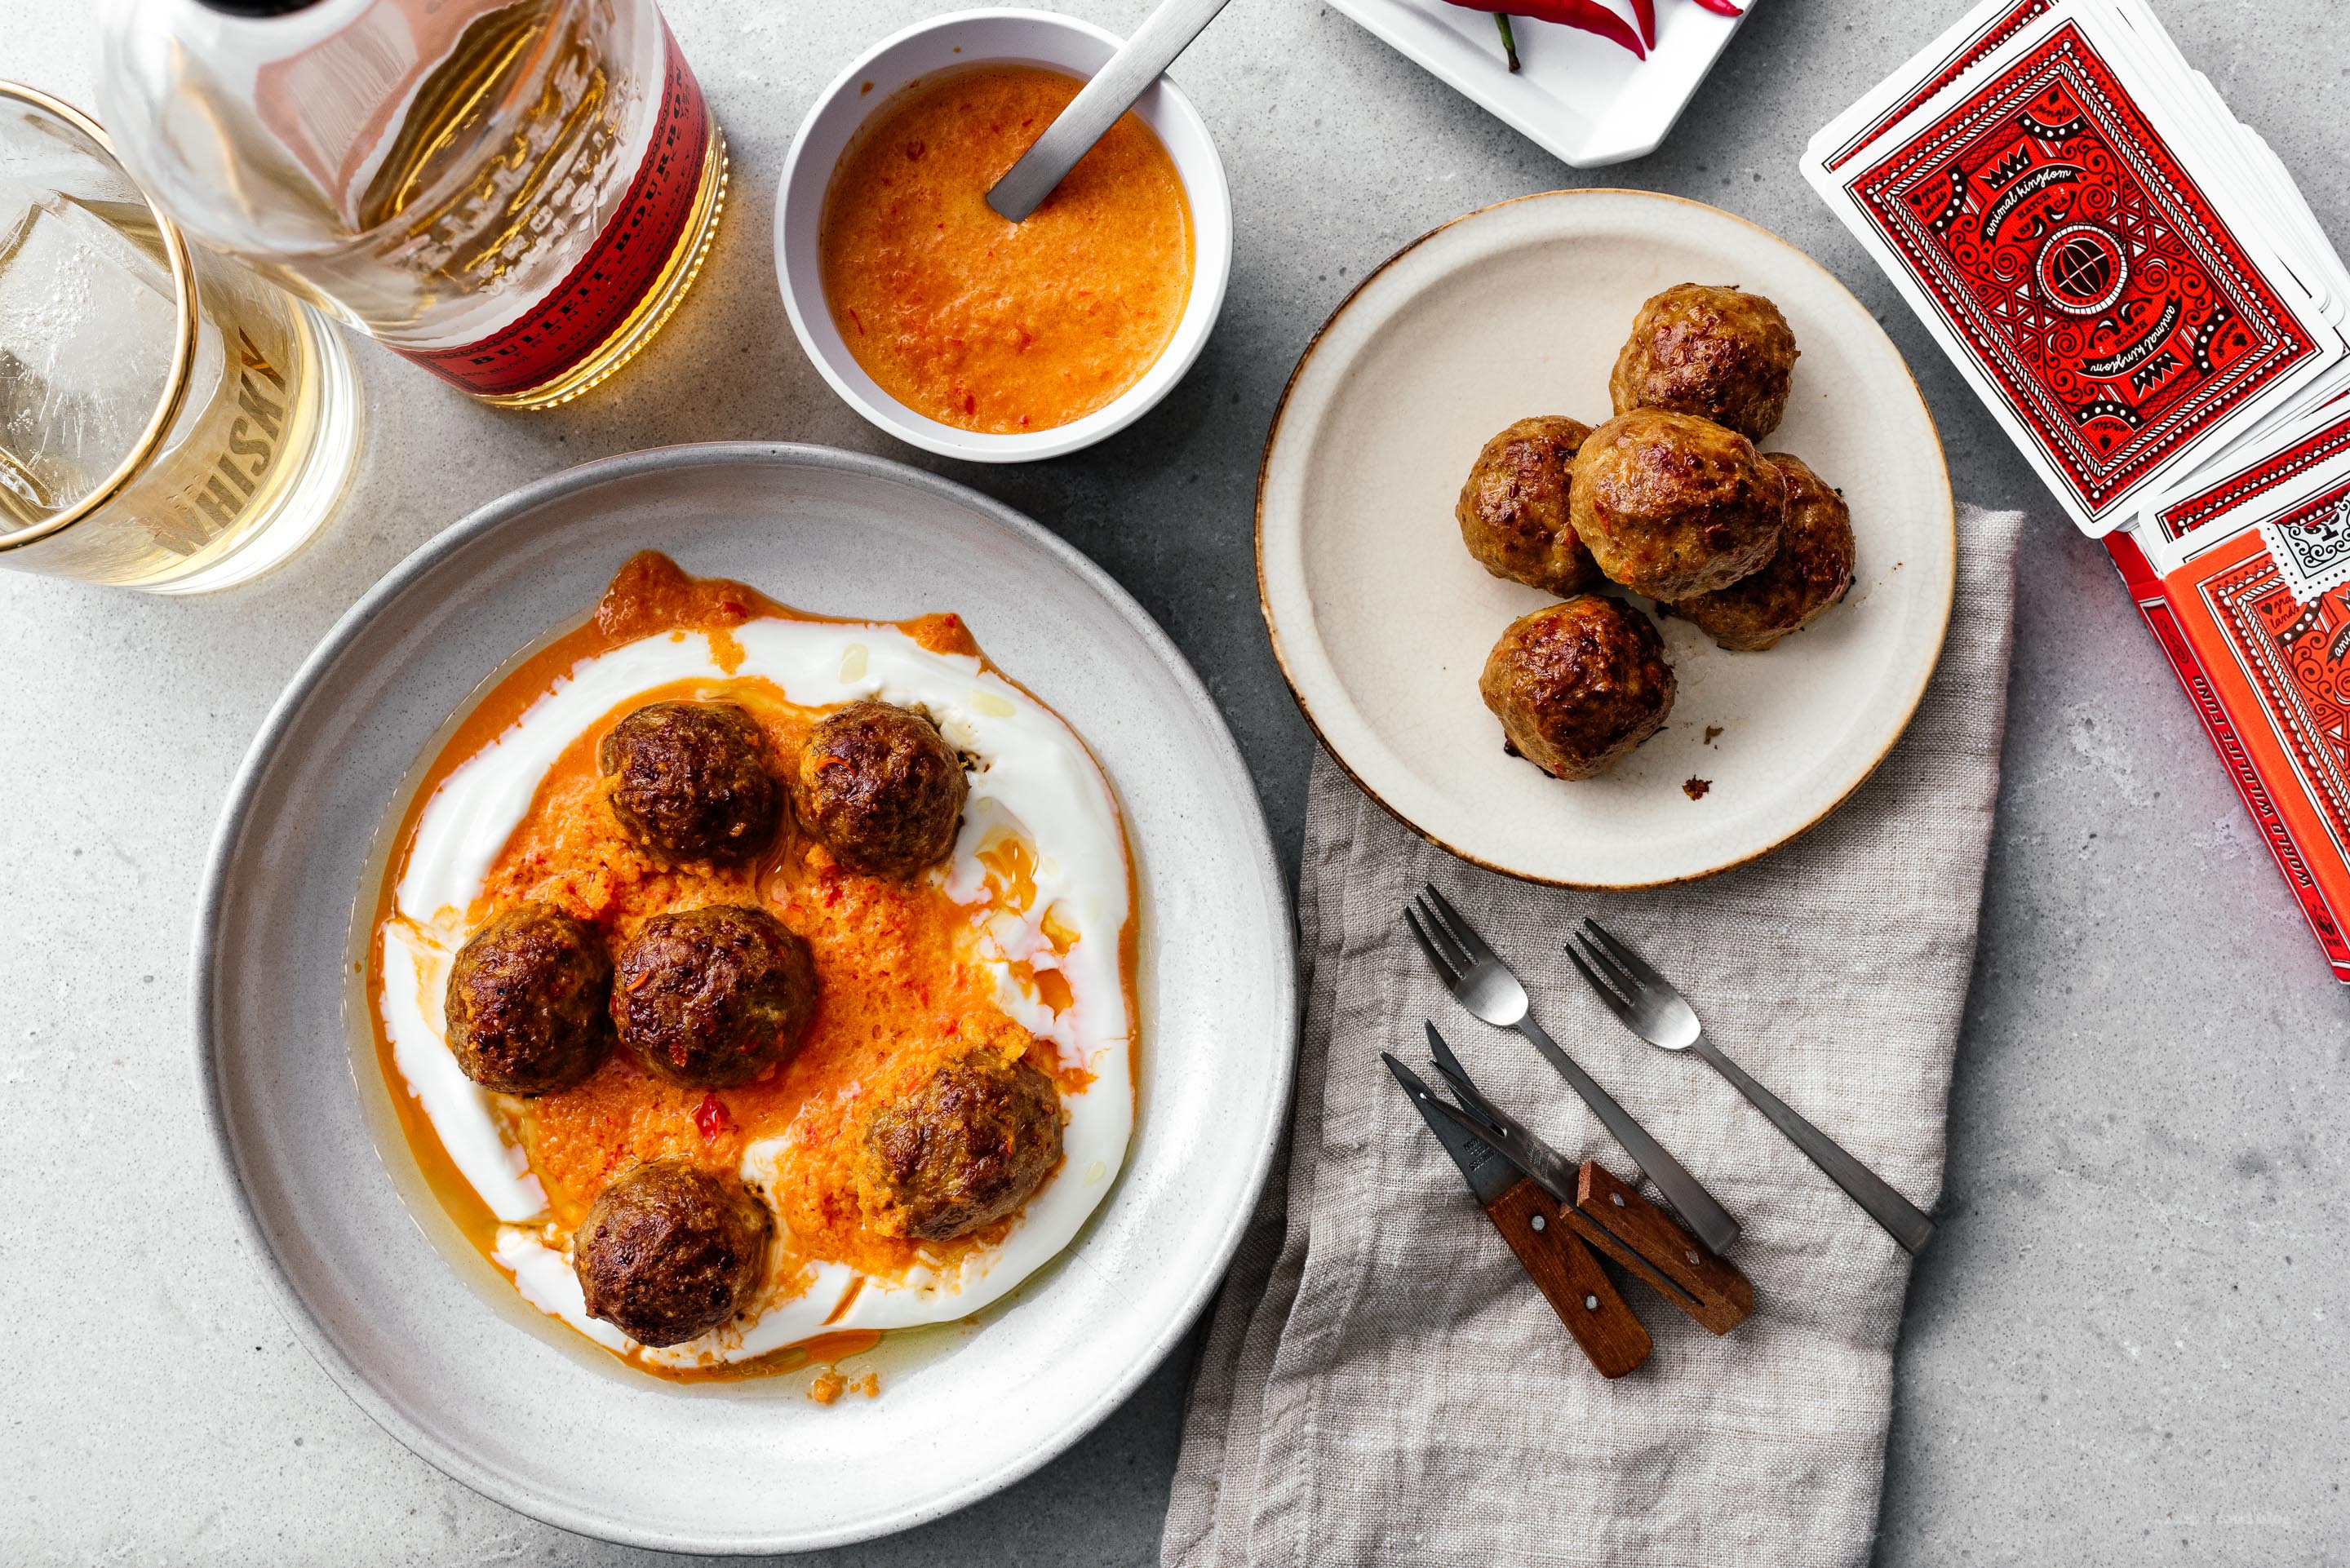
I Am... Make these Weeknight Piri Piri Pork Meatballs and Spice Up Your Dinner
I’m forever making meatballs for weeknight dinners and Mike thinks I’m crazy to want to mix up meat, roll them into balls and cook them, but I love meatballs! Really, it doesn’t take a huge amount of time to mix them up at roll them and you don’t use anything chopped up, it goes a lot faster. Instead of chopping onions or mincing garlic, I like to use garlic powder and onion powder in weeknight meatballs just because it’s so much faster. Plus, when you bake your balls, it basically leaves you with some time to relax while the balls are getting all crispy in the oven.
Read More →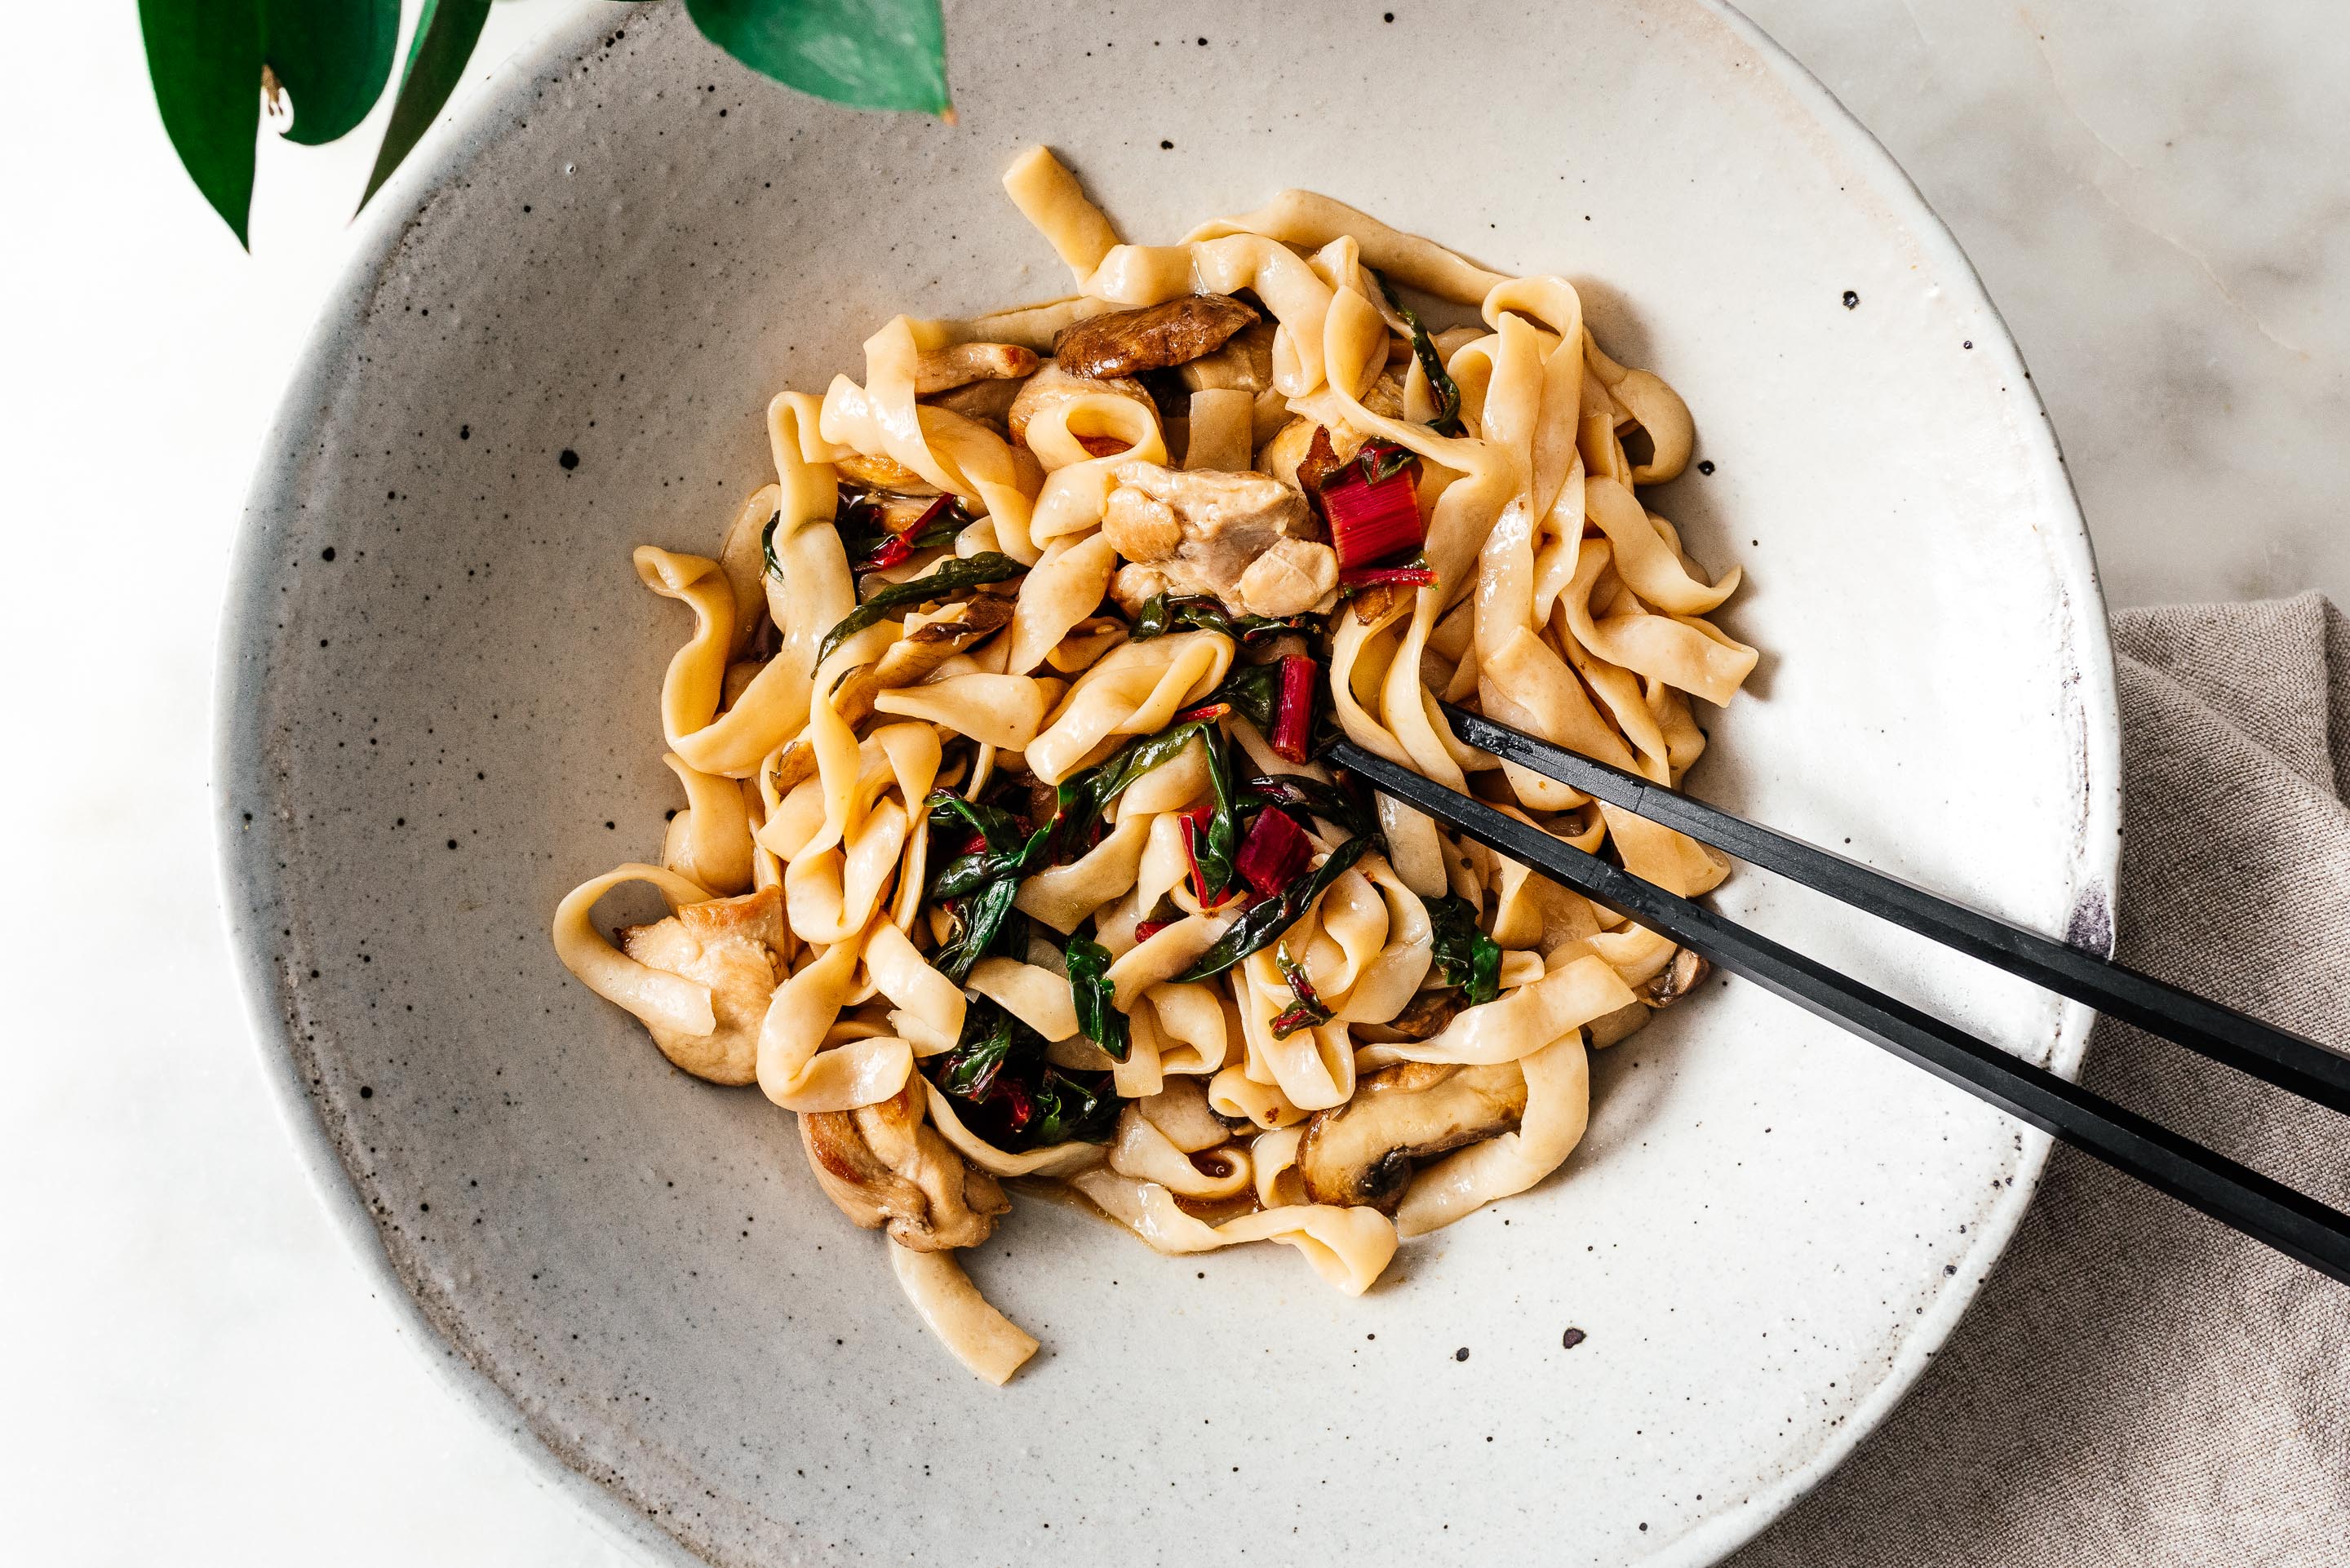
I Am... The Best Weeknight 10 Minute Keto Chicken Shirataki Noodle Stir Fry
I am super digging the keto lifestyle. I thought I would die (because #carblife) but really, I’ve been great! It’s been over two weeks now and while I did get that whole dreaded keto flu and some weird leg cramp thing, other than that, it’s been great. I’m pretty much killing it. I love it because it forces me to eat real food that I’ve made myself instead of falling back on my favorite store bought snacks and baddies. Of course, I still love noodles and noodle shaped things so of course shirataki noodles are in my mix. Have you ever had shirataki noodles? Or konnyaku/konjac? It’s AMAZING. Konnyaku/konjac is a Japanese food (it translates as yam cake) that is super low calorie and super low carb. It’s made from a plant from the taro/yam family but is nothing like taro or yam. Japanese people have been eating it for ages – literally since the 6th century. It comes in both cake (block) form and noodle form. The block form is usually cut into cubes and stewed in oden, a warm and comforting Japanese stew. In noodle form, you’ll find it as shirataki, which comes in many different noodle shapes. Shirataki have been touted as miracle noodles, zero calorie noodles, low carb noodles – you name it, they’ve been called it. If you haven’t had them before, they’re slick and slippery, and kind of flavorless, but they take on massive loads of flavor. Texture-wise, they kind of remind me of a firm jelly. I love konnyaku and shirataki so it’s no wonder that I’ve incorporated them into my keto diet. They go exceptionally well in soups, stews, stir-fries, and basically anything Asian. I have read a bunch of stuff on the internet about how shirataki noodles are disgusting and how you have to do a bunch of things to them to make them edible (boil in lemon juice, dry fry, rinse under running water for 20 minutes) but really I don’t understand where all of that is coming from. Perhaps it’s a cultural or expectation thing. Don’t think that shirataki are going to taste like pasta or regular noodles. They won’t. They’re literally made from a plant so they won’t have the same texture at all. Also, most Asian countries really like that firm, kind of chewy, squeaky texture so it’s no wonder that they use and eat shirataki on the regular. I mean, I can even just eat shirataki bundles in just chicken stock or dashi, it’s that good to me. If you haven’t had them, I hope you give them a try. If you’ve ever asked yourself, “what can I make with shirataki noodles,” this is it! They really mimic the feel of eating noodles, they’re low carb, and ... I don’t see any downsides. This chicken shirataki noodle stir fry was amazing. Marinating the chicken thighs in soy and toasted sesame oil makes them brown nicely, as well as giving them ultimate flavor. The swiss chard and mushrooms are a nice balance and the noodles pull everything together. Not bad for just 2 net carbs! Macros: 2 net carbs, 16 grams fat, 26 grams protein. As always, weigh your own foods to figure out the exact macros for your dish.
Keto Friendly Low Carb Chicken Shirataki Noodle Stir Fry Recipe
A quick and easy sesame soy chicken shirataki noodle stir fry that is low carb, keto friendly, and absolutely delicious. You’re 9 ingredients and 10 minutes away from low-carb, keto noodle heaven.
- 1 package shirataki noodles of choice (I used tofu shirataki fettuccine nooodles)
- 1 tbsp soy sauce
- 1 tbsp toasted sesame oil
- 1/2 lb chicken thighs, cut into bite sized pieces
- 1/4 cup no sodium chicken stock
- 1 tbsp rice vinegar
- 1 tbsp oil of choice
- 1 cup sliced mushrooms
- 3 leaves swiss chard, chopped
Pour the shirataki noodles into a strainer to drain, rinse off throughly with running water, and dry.
Marinate the chicken in 1 teaspoon of soy sauce and 1 teaspoon toasted sesame oil.
Mix up the remaining soy and toasted sesame oil in a bowl, along with the chicken stock and rice vinegar. Set aside.
Heat up the oil in a non-stick pan over medium high heat and cook the chicken until brown and cooked through. Add the mushrooms and swiss chard and cook, stirring soft and tender.
Add the drained shirataki and sauce to the pan and stir well to combine everything. Turn up the heat a bit until everything is slightly charred. Enjoy hot!
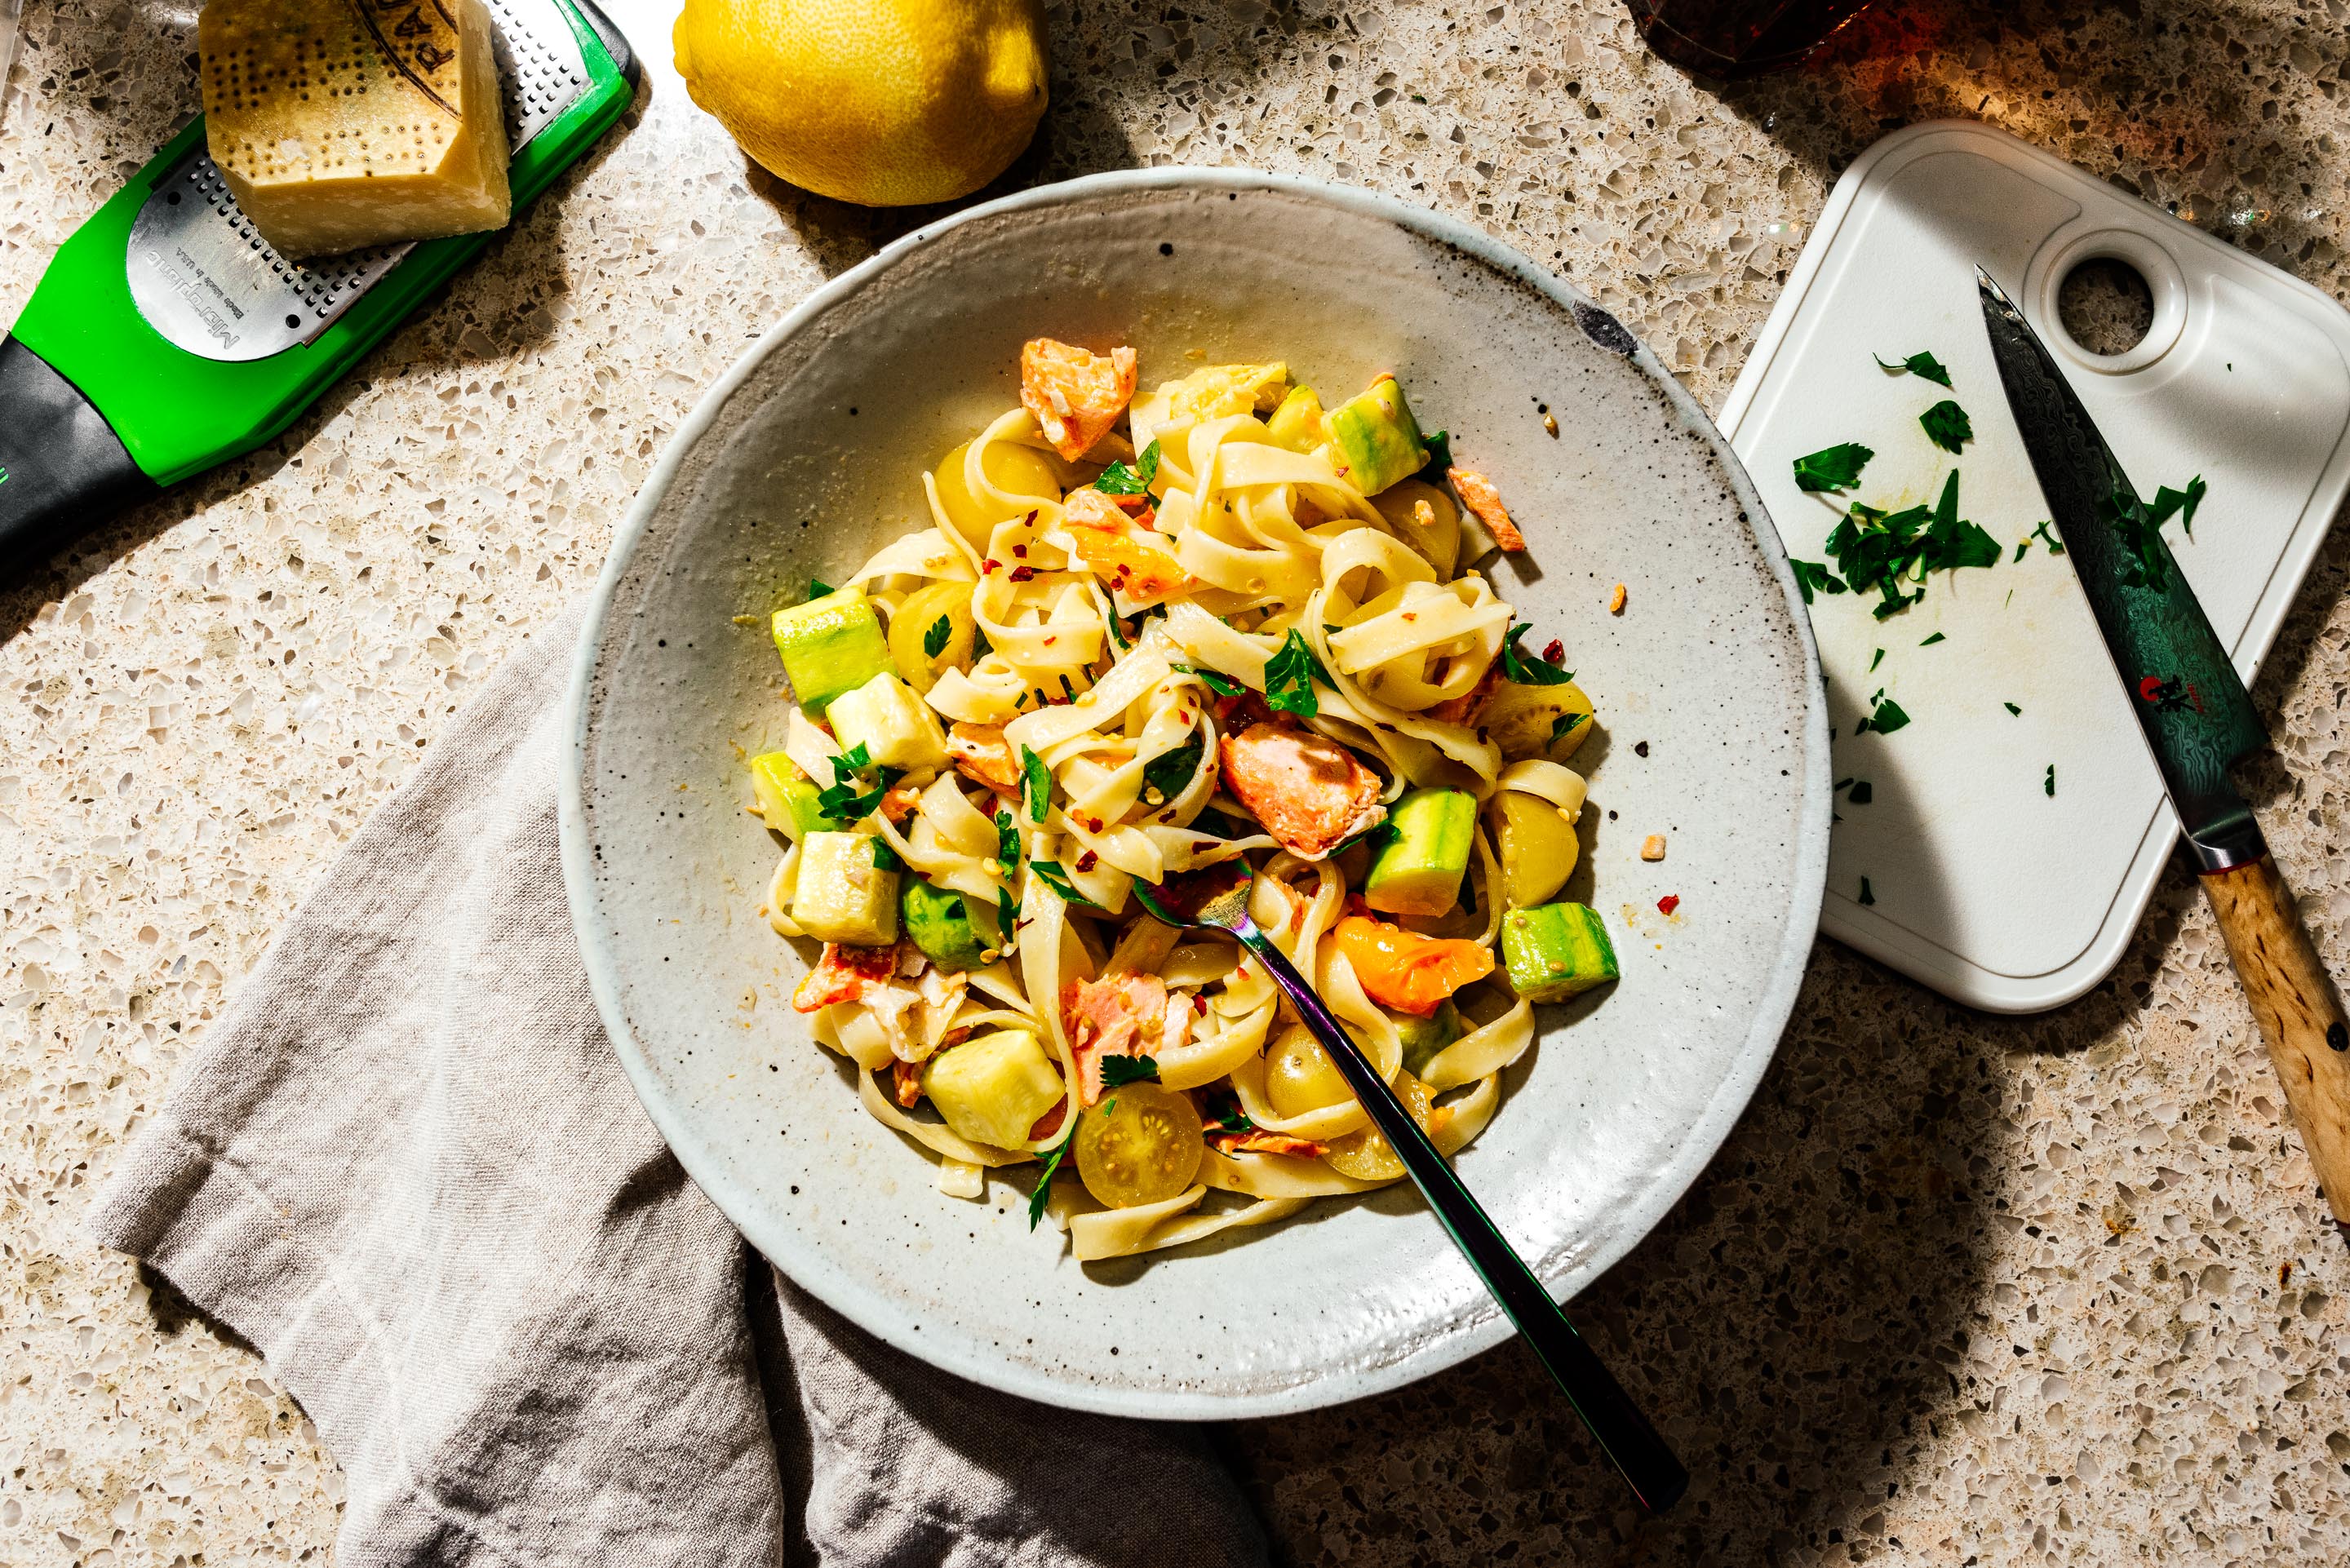
I Am... The best summer pasta is this super happy weeknight salmon tomato and zucchini tagliatelle
Summer is the season of not doing very much to your food to get it looking and tasting great. This pasta uses everything in season and not much else, and it tastes happy and amazing, kind of like if this pasta was an avenger, it’d be spiderman. Think perfectly cooked salmon, zucchini with just a tiny bit of bite, and both fresh and roasted tomatoes to get you that one-two hit of sweetness and brightness, all in something like 15 minutes and zero effort. Cooking Notes I peeled the zucchini with a vegetable peeler, which wasn’t a lot of work but was mainly for aesthetic reasons, so feel free to omit this step. I also roasted the salmon with the skin on to protect it, but removed it (and ate it) because I didn’t think the pasta would look or taste as fresh with it around, but feel free to leave it on. Ingredient Notes The salmon I used here is wild caught sockeye, which is in peak right now, but use whatever salmon or other fish you like, this is dinner and chill after all. On the other hand, it’s important to use high quality olive oil (first press or extra virgin) and proper Parmigiano Reggiano (with the laser imprinted rind and heavenly smell) for best results. What do you need? A baking pan, nonstick skillet, and a pot to boil pasta in. A microplane is awesome but any old grater will do. Garnish Garnish with chopped Italian parsley and lemon zest - I used the same microplane on both the cheese and the lemon without washing in between.
Weeknight summer salmon and tomato pasta recipe Serves 21. Preheat your oven to 500ºF/broil. In a heatproof baking dish, toss the zucchini, half of the tomatoes, and salmon in 1/4 cup olive oil, salt, and pepper. Broil for 10 minutes, then once done, transfer to a small bowl to cool and pour the remaining pan drippings to a non stick skillet. Optionally remove the salmon skin. 2. Bring a pot of salted water to the boil and cook your pasta according to package direction minus 3 minutes. 3. Transfer the pasta to the skillet and add the cheese, 1/4 cup olive oil, and 1 cup of pasta water. Bring to a boil over high heat. 4. When the psata water comes to a boil, add the reserved salmon and veg. Flake the salmon and crush the tomatoes. Toss until the pasta is al dente and a glossy sauce forms. 5. Taste and season with salt and pepper, then halve the remaining tomatoes and add to the pan. Give it a final toss and serve.
- 1/4lb salmon
- 1 cup tomatoes
- 1 zucchini, cubed
- 6oz pasta of choice
- 1/2 cup parmigiano cheese, finely grated
- 1/2 cup olive oil

I Am... Make bubble waffle ice cream cones at home: the best way to eat ice cream this summer
EEE!! Sometimes I make something and it turns out just the way I want and I get over the moon giddy about it. These bubble waffle cones/puffle cones/eggloo egg waffle cones were totally just how I wanted them to be. Confession: before this, I’ve never had a puffle cone. I think I’ve had literally thousands of egg waffles – they’re one of my all time favorite Hong Kong style treats – but shaped into a cone and filled with ice cream? Nope. Of course, all the awesome looking puffle cone places are far away – Cauldron Ice Cream in Santa Ana, Eggloo in NYC – so I just had to make some for myself.
Read More →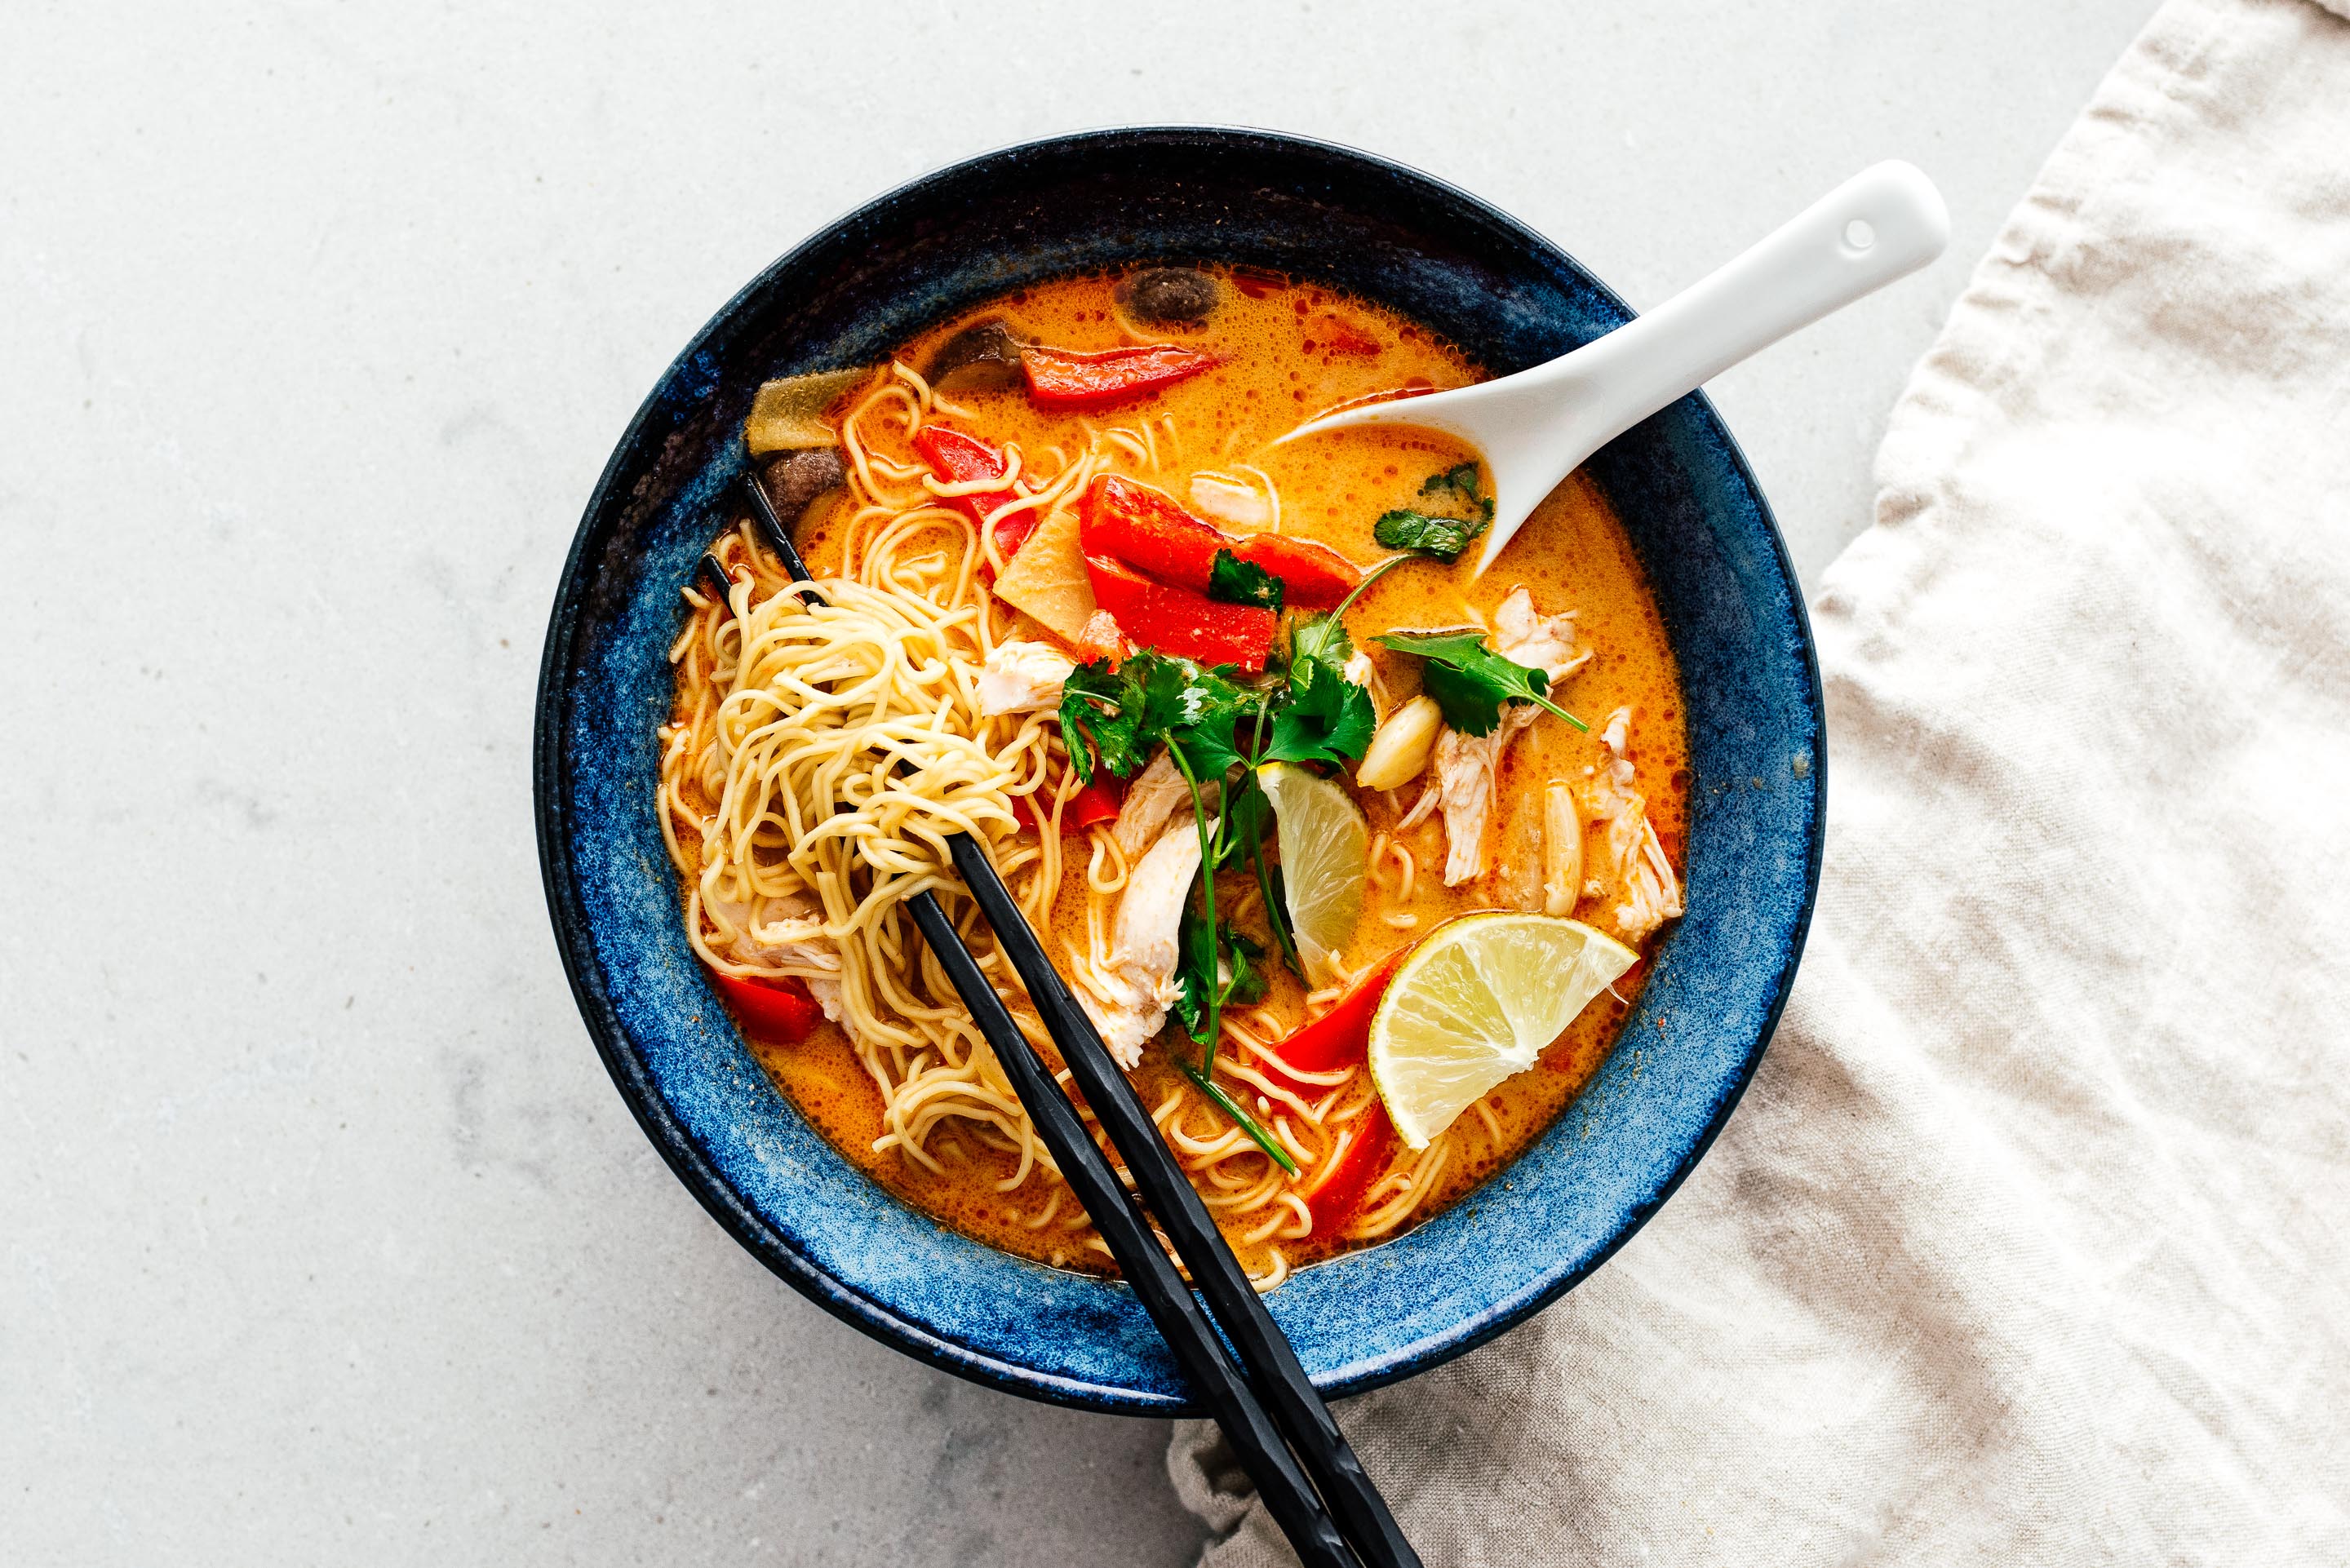
I Am... 16 Best Instant Pot Recipes to Make this Summer When You Don’t Want to Turn on the Oven
Damn it’s hot out there. These are recipes for the days when it’s too hot to consider even going near the oven, even if it’s off. And forget slow simmering a soup or stew on the stove – nope, hard pass. These 16 Instant Pot recipes are perfect for when you want comfort food but don’t want to sweat, literally. Well, unless you’re sweating from eating a big bowl of noodles. Because didn’t you know? Eating a hot food actually cools you down – it’s why they eat spicy things and hot soups in tropical countries. Super counter intuitive, but when you eat hot food, your brain takes notice and cools you down. Science. ¯\_(ツ)_/¯
Read More →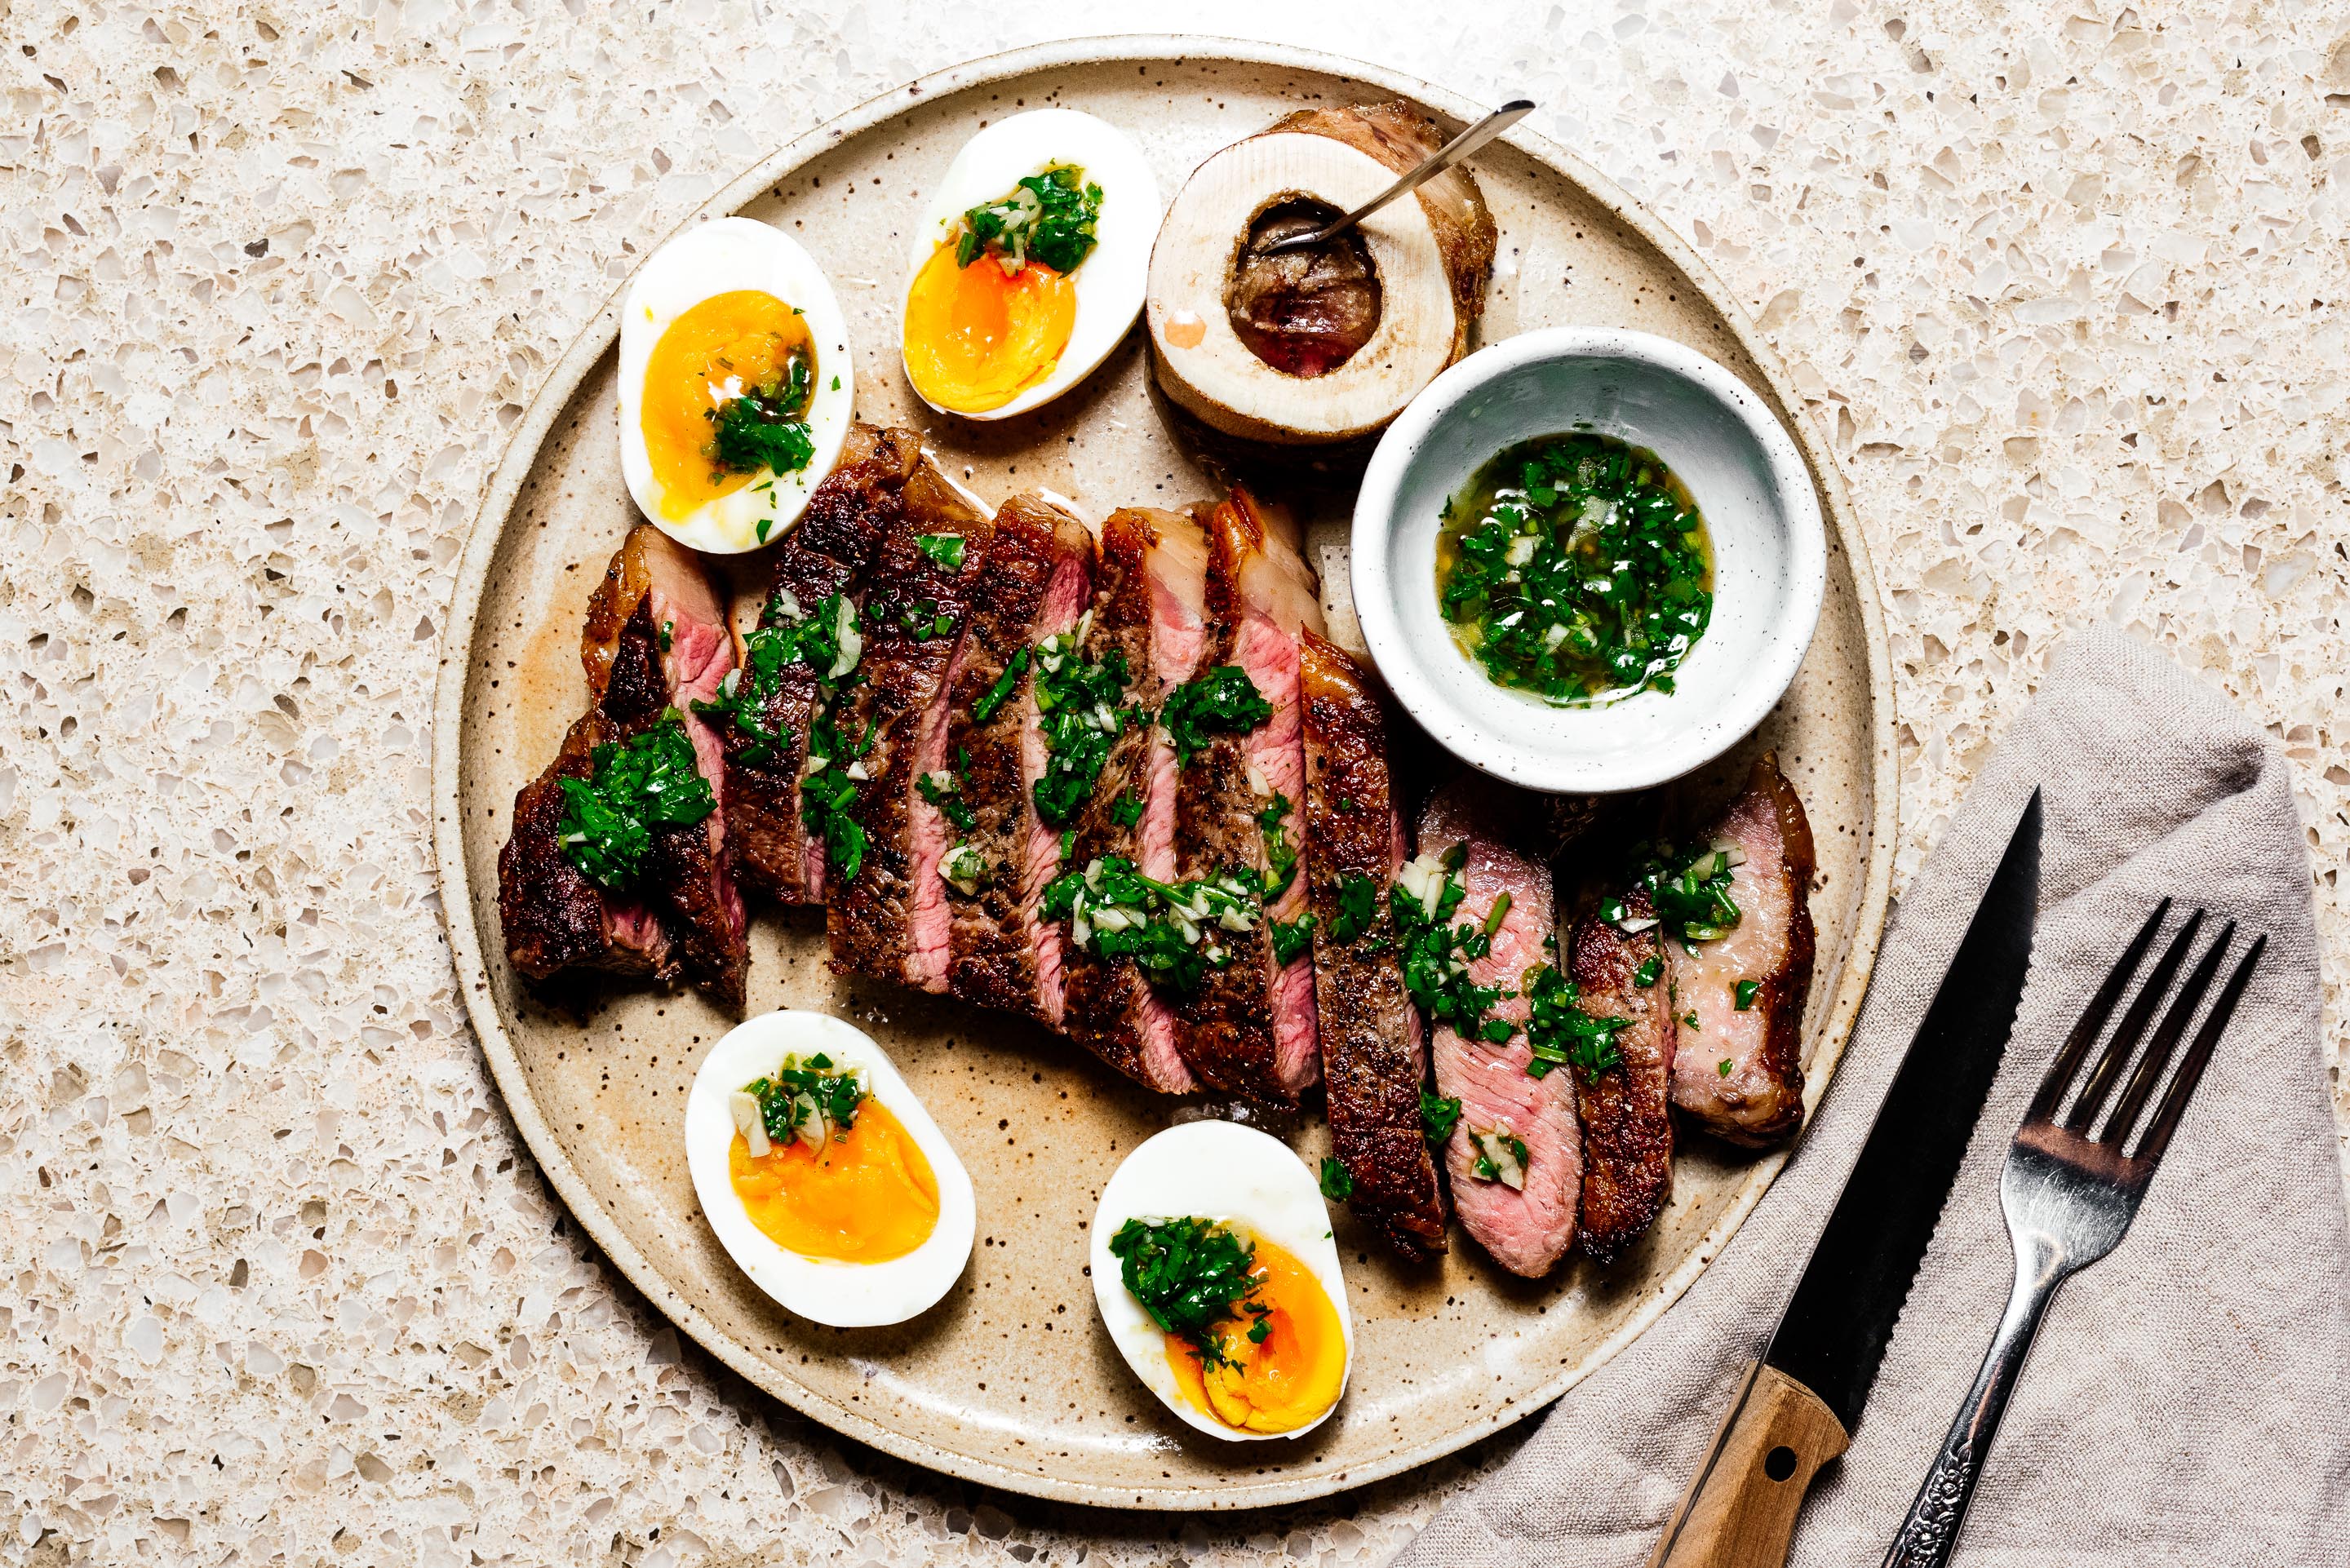
I Am... Oven roasted steak with Japanese chimichurri, roasted bone marrow, and jammy eggs
Date night shouldn’t be a stressful thing, and it shouldn’t be either boring or too experimental either. As long as your date is ok with cilantro, this one is a surefire date pleaser that can be done strictly by the numbers. Smoky, seared, perfectly medium rare steaks, a savory japanese inspired take on chimichurri, jammy eggs and a luxurious roasted and seared bone marrow will ensure a stress-free successful dinner that’s neither too heavy nor will result in a food coma. Cooking Notes I’ve done this steak a bunch of times now, at 200ºF, it takes 40 min on the steak total, and at 350ºF, it takes 20 minutes, both times are for a decent 1 1/2” higher end supermarket steak. If your oven goes that low and you have the time to spare, the 200ºF will produce a more evenly cooked steak, but to be really honest, I don’t think it’s always worth the extra time. I like to get my steaks to 115ºF, which is a perfect medium rare after searing. Steaks don’t need to be rare if they are high quality, and can often be off-putting if you don’t know for sure that the other person likes their steaks rare. Medium rare is always a safer choice. If you’re cooking on 200ºF, near the end the steak tends to go up 1 degree per minute. A fast meat thermometer is your friend here, and they are cheap. Sear your steaks 1 minute per side if using a stainless steel pan, and 30s per side if using cast iron. In both cases, use a liberal amount of high heat oil and allow the oil to get hot enough to just about start smoking. Turn on your exhaust fans, open some windows, and be ready to fan smoke away from your smoke detector. A splatter screen is highly recommended. Boiling the eggs ahead of time and then storing them unpeeled in the fridge will make both cutting and peeling them much much easier. Ingredient Notes Bone marrow is usually very easy to find at any major grocery store, but if they don’t have any out, ask the butcher shop for soup bones. What do you need? A high sided baking pan, a rack, and a cast iron or stainless steel skillet (or any skillet without a non stick coating). Things that will make your life easy and awesome: a cheap splatter screen and meat thermometer. Tiny spoons for the bone marrow would work great as well. What do you serve it with? Just what's here.
Weeknight date night oven roasted steak with japanese chimichurri, roasted bone marrow, and jammy eggs recipe Serves 21. Preheat your oven to 200ºF or 350ºF. Season your steaks on both sides and arrange on a foil lined baking tray. Place your bone marrow along side the steaks to roast, or do what I do, and place a rack over top to allow any excess fat to drip down and baste the steaks for you (this only works at 350ºF and if the bones are not frozen). Warm steaks in the oven - 40 minutes for 200ªF and 20 minutes for 350ºF. Use a meat thermometer to check it halfway through, every oven is different. 2. Combine garlic, rice vinegar, cilantro, sesame oil, and salt, and set aside. This amount makes what you see in the photos, so if you want a lot of sauce, double these amounts. 3. Bring a pot of water to the boil and cook your eggs for 7 minutes. Once done, plunge into an ice bath or under cold running water to stop the cooking. Set aside. 4. When your steaks hit 115ºF, remove from oven. Heat 2-3 tablespoons of oil in a skillet over high heat until the oil is smoking. Quickly sear the top and bottom of each marrow bone, then carefully sear each steak for 30 seconds per side (if using cast iron) or 1 minute per side (if using stainless). 5. Peel your eggs and cut in half, then slice your steaks against the grain and serve with chimichurri, jammy eggs, and roast bone marrow.
- 2 steaks of choice
- 2 marrow bones
- 1 garlic clove, crushed
- 1 tablespoon rice vinegar
- 2 tablespoons cilantro, minced
- 1 tablespoon sesame oil
- 1/4 teaspoon salt
- 4 eggs

Latest Comment
“I just love these posts from you. I actually only eat kosher so I can't eat any of this, but I love hearing about it fro...”Devora on Our Best Restaurants: Toronto 2025Popular
 2015 Holiday Giveaway
  One-Pot Lemon Scallop Pea Spaghetti
  Beer Battered Onion Rings, Jalapeno Aioli
  2014 Holiday Gift Guide and a Giveaway
  Easy Gourmet Hot Wings and a Giveaway!
 The Ultimate Veggie Sandwich
  Vegan(!) Creamy Corn Soup Recipe
  Sunday Brunch: Grilled Cheese Eggs Benny
